Saturday, June 9, 2012

Let the greens begin!

Exciting news: our summer CSA has finally started!
Better news: the first share was completely GREEN!  ...bok choy, green onions, sugar snap peas, lettuces galore, and my personal favorite - two whole bunches of spinach!

Being a green-veggie-lover and with a constant desire to increase my iron intake, you can imagine how delighted I was with our farm bounty.  I was ready to start cooking indeed.

Along with our vegetable CSA, we get an additional egg share.  So in addition to being blessed with lots of greens this week, I also received a dozen beautiful speckled eggs.  Hmm...what to do with these lovely ingredients?  Why make an eggy veggie tart!

I was browsing the NYTimes cooking for health section and stumbled upon this recipe.  I was happy to see that the crust of the tart was made with whole wheat flour and olive oil rather than butter (don't take me wrong, I do love a buttery pastry, but sometimes you've just got to shake it up).  Plus, the recipe called for gruyere cheese, a block of which I had on hand...a delicious delicious cheese from Formaggio Kitchen (perhaps one of my new favorite places).

Spinach Gruyere Tart
Adapted from NYTimes "Dandelion Tart" by Martha Rose Shulman

Ingredients:

- For the Crust - (You only need half this recipe for the tart!  Use the other half the same or next day for a pizza or a dessert tart or something.  You can keep the dough in the fridge for the night.)
  • 2 tsp active dry yeast
  • 1/2 cup lukewarm water
  • 1/4 tsp sugar
  • 1 large egg at room temperature, beaten lightly
  • 1/4 cup olive oil
  • 1 cupe whole wheat flour
  • 1 cup all purpose flour (plus extra as needed)
  • 3/4 tsp kosher salt

- For the Filling - 
  • olive oil
  • 1 small onion, chopped
  • 2 cloves garlic, minched
  • 1 large bunch spinach, chopped
  • 4 large eggs
  • 3/4 cup whole milk
  • 3/4 cup gruyere cheese, shredded (use the best gruyere you can find - it's worth it!)
  • salt and pepper, to taste
Directions:
  1. For the crust.  In your stand mixer fitter with the paddle attachment, mix together the yeast, water, and sugar.  Let sit for five minutes until the mixture is creamy/foamy.
  2. Then, beat in the egg and olive oil.
  3. Add the flours and salt.  Work the dough until it comes together into a mass, adding flour (one tablespoon at a time) if the dough is too wet.
  4. Turn the dough onto a lightly floured surface and knead gently for a few minutes until the dough is smooth.  Don't overwork it!
  5. Shape the dough into a ball, place in a lightly oiled bowl, cover tightly with plastic wrap, and let it rise in a warm, draft-free spot until doubled in size (approximately one hour).
  6. While your crust is doing its lovely rising, work on the green.  Saute the onion in olive oil until translucent and just starting to brown, stirring often.
  7. Add in the garlic and cook for 1 minute, stirring constantly.
  8. Add in the spinach and cook until just wilted...not more!  Season with salt and pepper.
  9. Beat the eggs in a large bowl.
  10. Now back to the crust briefly.  Preheat the oven to 375 degrees Fahrenheit.  Lightly grease, with olive oil, a 9-inch tart pan.  After the dough has risen, turn the dough out onto a lightly floured surface and gently knead it a few times.  Cut it into two equal pieces.  Use one piece for the tart; do something else with the other piece.
  11. Shape the piece into a ball and then cover loosely with plastic wrap.  Let it rest for five minutes.
  12. Then, roll the ball into a very thin round, making it big enough to fit into your tart pan.  Line your tart pan, being careful not to stretch the dough.  Cut off the extra, overhanging dough, using your favorite method (I like to take a rolling pin around the edge).
  13. Brush some of your beaten eggs onto the dough and place the crust into the preheated oven for 5 minutes.  Remove after 5 minutes and set aside.
  14. Whisk the milk into the eggs along with 1/2 tsp salt and lots of freshly ground pepper.
  15. Stir in the cooked spinach and the cheese.
  16. Pour the egg spinach mixture into the crust
  17. Bake for 35 to 40 minutes until the middle is set in the top is lightly browned.
  18. Allow the tart to sit for 15 minutes before serving...if you can resist.


Mmm tarts make for a beautiful presentation of vegetables indeed!

First piece...to be followed by many more.

This tart also makes for a looovely and nutritious breakfast the following day!  Definitely a success on multiple levels.

In other news, we have a new series of pets: wild turkeys!  It appears that a turkey family has settled into the area.  We have already had several visits...one brave turkey dude even ventured to the deck this afternoon!

Helllo gobble gobble.

There are three here!  One is partially hidden by the bushes.  This was the only day when I saw all three...otherwise it's been just the one brave turkey dude.

Friday, June 1, 2012

Les Croissants

If you have been following my blog, you will know that I am slightly obsessed with the Flour cookbook.  Every time I flip through the book, I pass the croissant recipe.  I always think "if only..." and promise myself that one day, when I have plenty (and I mean plenty) of free time, I will try to make them.  However, shamefully, I always get scared by the three dense pages of directions that follow the picture of Joanne's fluffy, buttery croissants.

I had a sudden burst of courage last week though - and a special occasion: mom's ___th birthday!  This was my chance to brave the loooong (but oh so well explained) directions and procedure of croissant-making.

My croissants came out beautifully - so much better than I expected (especially since Joanne wrote at the end of the recipe that our first attempt would likely be a flop...except she wrote this more subtly and eloquently).  The biggest issue when making croissants is the timing.  There are several steps, each separated by various-length time intervals of chilling in the fridge.  I wish I had timed myself differently  because I think I could have gotten an even fluffier result if I had.  Between the second to last and the last steps, there is an option to halt the process in the fridge overnight rather than allowing the croissants to finish proofing and baking them immediately.  Because I wanted to serve these as a birthday breakfast, I opted for the fridge-route.  However, my croissants deflated slightly in the fridge overnight, much to my dismay.  I was nervous they wouldn't puff up at all in the oven the next day, but luckily they did.  Nevertheless, I am convinced that if I hadn't gone the fridge-route, I would have had an even more amazing result.  Oh well...I guess I'll just have to make them again...

These croissants are delicious alone or with a touch of jam - I made Giada's blackberry basil jam to go along with them!  I also ate a croissant with a more savory lunch the next day - some beets, beet greens, goat cheese, and walnuts - and it was heavenly.

The great thing is that these croissants can be kept in an airtight containers and reheated/refreshed in the oven for the few days following their initial baking.  The reheated results isn't as good as the fresh product, but it's very close!  I even froze a croissant to see what the result would be (because this recipe makes a good, large 12 croissants...if I ate them all, I'd go into a butter coma!), but I haven't defrosted it yet, so I cannot report on the success/failure right now...hmm maybe a yummy lunch for today, come to think of it!

So I followed the Flour cookbook croissant recipe very very closely.  I studied the directions religiously!  It's too much to write the full recipe on my blog, but I will show pictures of all the steps with a few comments.  I highly recommend you go to your local library and rent the book (or bookstore and buy it...very worth it)!


First step: make the dough.

After relaxing in the fridge for a bit.

Roll out the dough into a square and mark four lines.

Roll out the flaps (initially triangular) into squares.

Break up the butter quickly in the KitchenAid and then spread it onto the center square.

Flap un.  Stretchhh!

Flap deux.

Flap trois.

Flap quatre.  Fin.

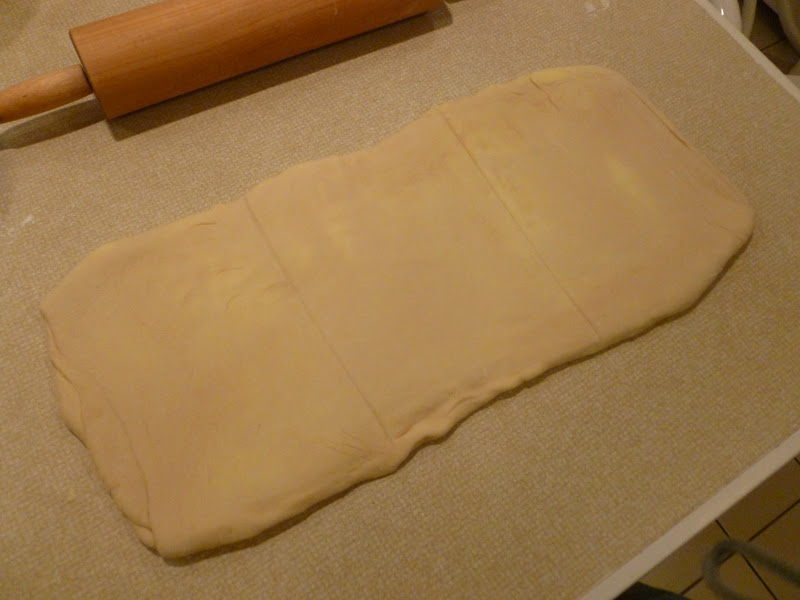
And then rollll into a rectangle.

Right side to the center line.

Left side to the center line.

Right over left.

And then roll it out again.  Time for the letter fold.

Right over middle.

Left over middle.

Into the fridge for some waiting.

Out of the fridge.  Time to roll again.

Another letter fold.

Right over middle.

Left over middle.

Back to the fridge!

Out of the fridge (again).

The ultimate rollllll.  Glad the table was just long enough...should have measured it first just in case.

Slice into triangles.  The Flour cookbook doesn't say to use the ugly end bits, but have no fear, I rolled them up just like their fellow nicely cut pieces...maybe not as pretty but just as delicious!

Little slits.

All ready for some stretching and rolling.

Firm but light grasp.

Stretch!!

Spread the top "Y" part.

Let the rollin' begin.  This is the best part.

Right to the end.

Seam side down.

First proof in a warm, cozy spot.

Look at how pillowy!

First egg wash.

Puffy little puffies.

Here's where I halted the proofing process overnight in the fridge.

See, slightly deflated the next morning.

Second proof.  Then second egg wash.  Then cooking time.

Mmm golden and delicious.  The house smelled like butter for two days!

Glamour shot.

A perfect birthday breakfast, complete with both kitties.

Sassy was my croissant-guard-cat as I made the coffee.

Oooh look at that.

Crispy outside, fluffy inside and oh so decadently buttery.

So airy inside!

Mmm and the rest is history...

These croissants definitely took a lot of time...extremely labor intensive...but if you can spare the time, it is so worth it!  Never thought I could do it, but thanks to the excellent directions in the Flour cookbook, some courage, and some patience, I did!

What will my next challenge be?  Suggestions welcome!

Back in the game

Clearly taking physics and genetics together in one semester is not conducive to baking or blogging.  It's rather embarrassing that I haven't posted anything since spring break.  To boot, I've been home for two weeks now, carefree, no work, and still haven't blogged one entry!  But that doesn't mean I haven't been baking...no worries there, the stove and the oven have been working overtime.

I have finally sat down to blog for the first time this summer, and I promise that from this point on (at least until the fall semester begins), I will faithfully blog about my culinary adventures, among other things.  That being said, this first summer post (above) is my pride and joy...enjoy!