Sunday, October 7, 2012

Tomato Soup Two Ways

There is one very big advantage to being back at school: the tomatoes at the Farmer's Market here are magical.  They are so sweet, and there are so many lovely varieties.  Week after week, they keep coming.  Yes, they will eventually end, but I find it amazing that even in October I can still get firm and flavor-packed tomatoes.

To take full advantage of tomato season, I made two different tomato soups...all the while eating pint after pint of cherry tomatoes of all colors.

The first soup came about after a conversation with my favorite tomato vendor.  I asked him what the best tomatoes would be for a soup...and the conversation evolved into him spilling his tomato soup secrets...

Slightly Spicy Roasted Tomato Soup
(inspired by my tomato vendor)

Ingredients:

  • 3 pounds beefsteak tomatoes, cut in wedges
  • 1 poblano pepper, seeds and ribs removed, cut into large pieces
  • 1 onion, cut into wedges (keep the layers together)
  • olive oil
  • salt and pepper
  • 3 cloves garlic, don't peel!
  • 3-4 cups vegetable broth
Directions:
  1. Preheat the oven to 375 degrees Fahrenheit.
  2. Place the tomatoes, pepper, and onion on a baking sheet.  Drizzle with olive oil and then sprinkle with salt and pepper to taste.
  3. Wrap the unpeeled garlic in tin foil (make a little packet) and add it to the baking sheet.
  4. Bake the vegetables for about an hour, to your desired roast-i-ness.
  5. Transfer the vegetables and their juices to a bowl and allow the vegetables to cool.
  6. Open the foil packet and peel the skin off the garlic.  Add the garlic to the rest of the vegetables.
  7. Transfer all the vegetables to a blender or food processor.  Add 3 cups of vegetable broth.  I managed to (barely) do this in one batch, but you may need to do two.
  8. Blend to your desired consistency.  I made mine very smooth.  Add more broth if it is too thick.
  9. Pour the soup into a large pot and heat it over medium high heat.  Reduce the heat to low and let the soup simmer for twenty minutes or so.  Taste and adjust the seasonings.
  10. Top with a parmesan crisp (see below) and eat hot or cold - both are delicious!
Oven-ready.

Roasted to perfection and ooozing juices.  The flavors have had an hour to mingle and marry inside the oven, yum!

This garlic was so sweet and sticky after being roasted!  Amazing smells coming from this packet, too.

Everyone in the bowl to rest for a while.

Yes, I filled the VitaMix to the brim...maybe not the smartest thing to do, but it worked like a charm!

Gorgeous gorgeous color.

Parmesan Crisps

Ingredients:
  • shredded parmesan
Directions:
  1. Preheat oven to 375 degrees Fahrenheit.
  2. Line a baking sheet with parchment paper.  Sprinkle parmesan into 3-inch circles on the parchment paper.  Make as many as you like.  I found that they even stayed crispy on day two after being stored in a plastic baggie.
  3. Bake for 5-10 minutes, checking after 5 minutes and keeping a close eye to make sure they don't burn.  You want the cheese to melt and become slightly crispy and golden.
Easiest recipe: all you do is sprinkle the cheese and bake!

Nice and golden.  
A cheesy, salty crisp for my slightly spicy soup.  A perfect pairing!
I was so in love with this soup - and correspondingly so depressed the day after I finished it all - that I knew I needed to make another one.  Obviously, it wouldn't be the same recipe.  I decided to go in a completely different direction.  While the first soup was rather naked, this soup was dressed up with some spices and coconut milk.

Coconut Curry Tomato Soup
(adapted from Oh She Glows)

Ingredients:
  • 2 1/2 pounds tomatoes (I used 1 1/2 inch round tomatoes...I forget what they were called)
  • 1 small onion, sliced but layers kept together
  • olive oil
  • salt and pepper
  • 3 large cloves garlic, don't peel!
  • 1 cup coconut milk
  • 2-3 cups vegetable broth
  • 1 heaping tbsp tomato paste
  • 1 tsp curry powder
  • 1/4 tsp nutmeg
Directions:
  1. Preheat oven to 400 degrees Fahrenheit.  Line a baking sheet with tin foil.
  2. Slice the tomatoes in half and arrange cut side up on prepared baking sheet.
  3. Sprinkle with salt and pepper.
  4. On another baking sheet (line if you wish), arrange the onion slices and drizzle with olive oil.  Sprinkle salt and pepper on top.
  5. Wrap the unpeeled garlic in tin foil (make a little packet) and add it to the baking sheet with the onions.
  6. Place the tomatoes, onions, and garlic in the oven.  Roast for 30 minutes and then check the onions.  Take them out if they are starting to brown but leave the garlic in the oven.  Roast the tomatoes and garlic for a total of 1 hour or so.
  7. Remove the roasted vegetables from the oven.  Place them and their juices in a large soup pot.  Peel and add the roasted garlic.
  8. Add the coconut milk, 2 cups vegetable broth, tomato pastes, curry powder, and nutmeg to the soup pot.  Stir well.  
  9. Bring the soup to a boil over high heat and then reduce to a simmer.  Simmer for 15 minutes, stirring often. 
  10. Allow the soup to cool to lukewarm and then transfer to a blender or food processor.  Blend to your desired consistency.  You may need to add more broth if the soup is too thick.
  11. Check the seasonings.  You may need to add some more curry powder, salt, or pepper, to your liking.
  12. Serve hot or cold with some yummy toppings...may I suggest toasted cashews and homemade croutons?
Pretty tomatoes...and they amazingly all fit perfectly on the sheet!  This made me extremely happy :)

All roasted!

Close up.

After simmering...smells so yummy!

Ready to blenddd.  I added more veggie broth after the first blending.

Back to the stove to heat up.

Topped with toasted cashews and croutons (rye and raisin bread drizzled with olive oil and toasted in the oven then spread with extra roasted garlic I had made).

So creamy and filling.  An absolutely satisfying meal with a unique flavor combination!

Both soups were amazing and very very different, but it's hard to say which one I liked more!  The great thing was that these soups tasted fantastic both hot and cold, which was very handy for the end-of-summer scorcher days, mixed with beginning-of-fall night chilliness.

And now it's October, which means it's time for squash soups of all sorts!  Ah soup, I do love you so...

Wednesday, October 3, 2012

End of Summer Summary

As is evidenced by my complete lack of posting in the last two weeks months (...started writing this post a good month ago and never finished it), I am, once again, back at school.  The last week of summer was so filled with cooking and hanging out with friends from home (and I suppose packing...) that I never sat down to blog about anything I made.  Let's just say I cooked a lot in that last week, and I even had a lovely dinner party.  Here's a recap of some of the yummies that went into my tummy in that last week as well as some other random dishes from earlier in the summer that I never blogged about...

Let's start with the dinner party because it was absolutely fabulous!  Inspired by Julia Child's 100th birthday (and p.s. I am now reading her new biography "Dearie"), I decided to make coq au vin.  This was my first time ever following a Julia Child recipe word-for-word (...well I thickened the sauce with cornstarch rather than flour for a gluten-free friend).  Yes, I even flambe-d the chicken with some cognac...and managed not to burn the house down).  I had shied away from Julia Child ever since a melt down ensuing from trying to follow her confusing directions for the cake base of a buche de noel.  I am proud to say, however, that the coq turned out splendidly!

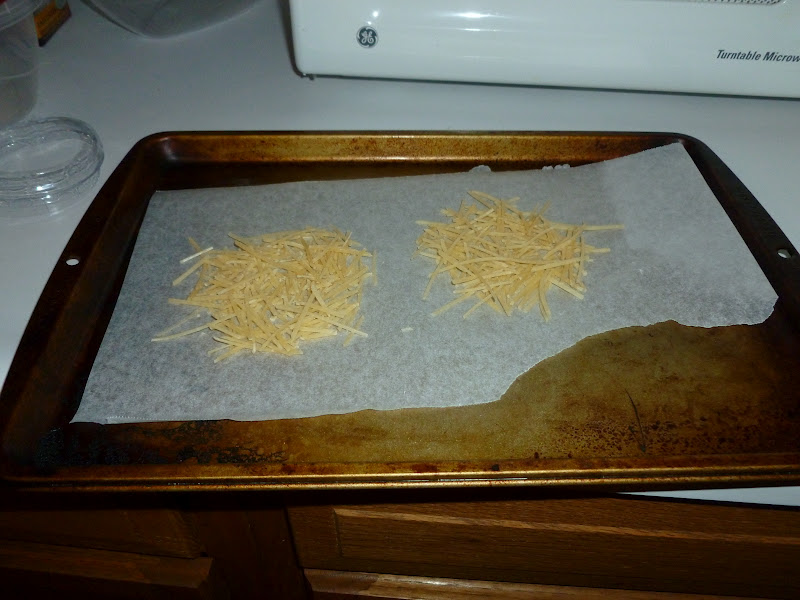
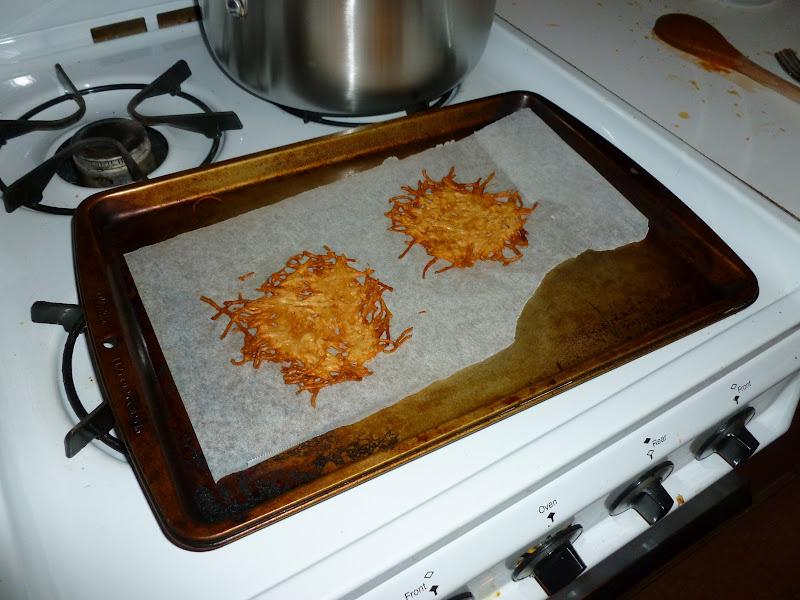
Green beans tossed in olive oil, salt, and pepper, and then sprinkled with shredded parmesan and roasted!

Coq au vin...my apologies that it is not the most photogenic dish...but it was yummy.

Basil mashed potatoes.

Vegetable Tian.  Zucchini, tomato, summer squash, eggplant, and potatoes with caramelized onions on the bottom and topped with plenty of gruyere and fresh thyme.

And then there was the fluffiest multigrain bread I made from Peter Reinhart's recipe...and the most fabulous sandwich that resulted from it.

I only made a half recipe...but it rose so well that I got two huge, puffy loaves!
And now the sandwich: sauteed eggplant, basil, tomato, and fresh mozarella...toasted and melted to perfection!
And then there was vegetarian lentil and swiss chard shepherd's pie...

Beautiful swiss chard and lentils sauteed with some balsamic...

...and topped with mashed potatoes and baked!
And then a most fabulous breakfast...

My multigrain bread put to use again...French toast stuffed with Fromager d'Affinois and topped with the fruity center of some left over blueberry crisp (from the coq au vin dinner party)
And vegetable ice cream?  I did it again!  (Remember the delicious and so pretty pink beet ice cream I blogged about a few months ago?)  Thanks to corn's natural summer sweetness...

Sweet corn ice cream, inspired by my most recent trip to Oleana.  If I may say so, I think my sweet corn ice cream turned out better than theirs; it was certainly creamier whereas theirs had a little bit of icy-ness.
And who doesn't like a new cookie recipe?

Walnut blueberry jam thumbprint cookies.  Such a buttery base with a lovely crunch from the walnuts and sweet hint from the jam!
And then a spicy flair...  One of my biggest struggles this summer was finding out what to do with all our CSA jalapenos!  Unfortunately, I learned the hard way that my skin is especially sensitive to jalapeno spice...from now on, gloves.  Always.

Jalapeno corn muffins make the perfect accompaniment to a big bowl of sauteed peppers, corn, and carrots with oregano and cumin.
And after several days culturing my sourdough starter, I made two different breads:
(Unfortunately, I forgot to freeze my starter at home before coming back to school...and I was informed that it was thrown out after a few weeks as it was developing some sort of scary black spores.  Sorry starter dude.)

The first bread.  Just a simple sourdough, nothing fancy, but such a lovely sour hint and a crispy crispy crust.
The second bread.  A Poilane-style miche.  Made with lots of whole wheat flour, which made the flavor more complex than the plain sourdough bread...plus the extra time for my starter to develop certainly added to the flavor punch.

And what is better than visiting a farm stand in the middle of the summer and buying nectarines?


Perhaps making them into a salad with green beans, avocado, radishes, and hemp seed all dressed with a light lime and cumin vinaigrette!
And how does one dress up a beautiful head of cabbage?

With some curry powder and kefir of course!  Sitting on a bed of spinach and topped with toasted cashews, this was a very satisfying and super nutritious meal.
And after shelling our cute little CSA peas, I decided they were to be hummus-ed.

Sweet peas with some white beans, tahini, salt, pepper, garlic (oops can't remember what else was in there...lemon juice probably?), served aside homemade superbly seedy crackers (Oh She Glows Endurance Crackers).
Finally, at times, our CSA supplied us with outrageous amounts of scallions...these scallion meatballs were the perfect solution!

Scallion meatballs (made with dark meat ground turkey) atop a bed of bamboo rice (Yes, it comes green because it has been infused/grown in bamboo juice!!  I know, so cool.) with sauteed radishes and a drizzle of glaze (ginger, soy sauce, mirin, brown sugar, basically.  delicious.).
Well there's a little summary.  I wish I had had the time to write about all these dishes in full length posts because I have so many pictures for each of them!  Hopefully I've learned my lesson...  Oh well, at least these dishes finally made their way to the blog.  If you would like the actual recipe for any of these, just post a comment, and I will reply with all the information!

Let's see how well I can keep up in these next few months...  Just know, even if I'm not blogging, there's plenty of cooking going on, and my brain is always (and I mean always) swirling with food ideas!

Thursday, August 16, 2012

Just Peachy

In the last few years, my love of peaches, nectarines, plums, and other stone fruits has increased exponentially.  In terms of peaches, however, I never really paid attention to the different types.  I always bought yellow peaches because I had often heard people say white peaches tend to be watery and don't have as much flavor as yellow peaches.  Not true!  (Or shall I say, not always true.)  I saw some beautiful white peaches at the farmer's market recently and decided I had to try them.  It was love at first bite, slurp, savor.  These peaches were so juicy an so sweet.  Lots and lots of peachy flavor.  Why had I listened to people for so long and poo-poo-ed white peaches?  I think that as long as you get your white peaches locally and in the height of the season, you won't be disappointed.

This is such a summery ice cream (although I'm sure it would taste good in the dead of winter if peaches this good were available then).  The skin of my white peaches ended up giving the ice cream a gorgeous pink-purple color, and the vanilla been seeds added some cute polka-dot-pizzaz, not to mention tons of flavor and natural sweetness.  In a classic Fred-move, I added some cognac...(Is it sad that when I opened the bottle of cognac - to flambe chicken in coq au vin the other day - that I immediately thought: this smells like ice cream.  Is this backwards?  Perhaps.  I'm ok with it.)  Anyways, this is a recipe to hold onto!  I also recently discovered local white nectarines...dare I say maybe even more amazing than white peaches?  I definitely look forward to adapting this recipe to use white nectarines next summer!

White Peach Ice Cream
adapted from Daydreamer Desserts

Ingredients:

  • 3 ripe white peaches
  • half a vanilla bean
  • 1/4 cup granulated sugar
  • juice of half a lemon
  • 1 cup whole milk
  • 1 cup heavy cream
  • 2 egg yolks
  • 1/4 cup plus 2 tbsp light brown sugar
  • pinch of salt
  • 2-3 tbsp cognac

Directions:

  1. Peel the peaches, reserving the skins.  Remove the pits, reserving the pits.  Place the skins and pits in a medium saucepan and set aside.
  2. Chop the peaches into medium-sized chunks and place them in a medium pot.  Add the granulated sugar and the lemon juice.
  3. Cut the half vanilla bean lengthwise to get to the seeds.  Now, cut the half bean in two so you'll have two fourths (both split lengthwise).  Take one fourth and scrape out the seeds.  Add these seeds and this fourth of a bean to the pot with the peaches.
  4. Bring the peaches to a boil then reduce to a simmer and cook for 20-30 minutes until the peaches are super tender.  Let cool to room temperature and then put in the fridge for a few hours to chill completely.
  5. Stir together the milk and cream (I do this directly in the measuring cup to save dishes!).  Add the milk and cream to the saucepan with the skins and pits.  Remove the seeds from the other fourth of a vanilla bean and add these along with the bean to the pan.  Heat over medium heat until the mixture comes to a simmer.  Remove from the heat and cover.  Let the mixture steep for at least an hour...or do what I did: let the mixture come to room temperature then place in the fridge overnight.
  6. When ready to continue, strain the skins and pits from the milk and cream.  Press on the skins and pits to extract extra flavor.  In the medium saucepan again, reheat the milk and cream over medium heat until little bubbles form around the edges of the pan.  Don't simmer or boil the milk!  Stir often as it's heating so you don't get a skin.
  7. Meanwhile, whisk the egg yolks, brown sugar, and salt in a medium bowl until they become thick and light yellow.
  8. Slowly add the hot milk and cream mixture into the eggs to temper them.  Whisk constantly while you do this!  Be careful with this step - you don't want scrambled egg ice cream!  (Oh wait, potential new flavor?  Not sure how that one would go over...).
  9. When all the hot liquid has been added to the eggs, return the whole mixture to the saucepan and cook over very low heat for several minutes until the custard is this enough to coat the back of a wooden spoon.  Stir constantly with a rubber spatula, making sure to scrape the bottom of the pan as you go!
  10. When thick, pour the custard through a fine mesh strainer into a bowl.  The strainer will catch the vanilla bean and any undesirable cooked egg lumps.
  11. Meanwhile, remove the cooked peaches from the fridge.  With an immersion blender or in a blender, puree the peaches to your desired smoothness.  I left mine perhaps half their original chunkiness.
  12. Stir the peaches into the custard base.  Add the cognac and stir until well combined.
  13. Place the mixture into the fridge for a few hours until very cold.
  14. Freeze the ice cream in your ice cream machine according to the manufacturer's instructions.

It all starts with perfectly ripe local white peaches.

Peeling peaches is rather labor intensive, but do it outside on a nice sunny day, and you'll have a lovely time!

Looks like the peach is wearing a baseball cap!

Juicy juicy white peaches.

These peaches are already super sweet, but all ice creams need an extra sugar kick for smoothness.

Lemon and fruit: a match made in heaven.

Seeding your vanilla beans
Before cooking...

...after cooking.

In goes the creaminess.
Before cooking...

...after cooking. 

Strain all the pits and skins.  It's so purple!  Very unexpected.

Eggs and brown sugar get a good whisking.

Temper time.

Low and slow, stirring until slightly thickened.

Time to marry the cream and the pureed peaches.

Gorgeous pink with specks of vanilla bean seeds.

The start of the freeze.

The end of the freeze.  So creamy and dreamy!

Into a pre-chilled glass container...see you in a cone in a few hours.

A summery cone enjoyed on the deck for afternoon snack.  What could be better?
 Want some ice cream?  Come on over...the volume of peaches in this recipe made for a huge batch!  (And I even halved the original recipe!!)