Sunday, February 10, 2013

Buzzz buzz Granola

Looking back over old posts, I realized it has been quite a while since I last wrote an entry about granola. This is rather odd considering how often I make granola, and I rarely make the same exact granola twice.  The beauty of granola is that you can make infinite substitutions once you have a basic ratio of oats : nuts : sweetener : oil : add-ins in place.  This also comes in handy when you want to clean out your pantry.  In my family, we have something called "fridge soup".  There's no actual recipe; it's just whatever is starting to look a little tired in your fridge plus an onion and some spices, finished by being pureed (or what we call "mix-souped").  Going along with this idea, I think I will dub my granolas "pantry granolas" because I rarely rarely follow a recipe fully; there are always substitutions and additions to be made based on what I have lying around!

Below is my latest granola creation, the idea sparked by a container of hazelnuts and a 1/2 gallon of honey sitting on my shelf.  This granola has an intensely honey flavor, so make sure you use a good honey that you like.  The honey I used came from bees living in alfalfa fields.  It's a really delicious sweet and light honey, which gave the granola some beautiful floral notes.

A towering pile of granola, among what little remains of Nemo's thankfully pathetic visit to my neck of the woods.


Honey Buzzz buzz Hazelnut Granola

Ingredients:

  • 2 1/4 cups old fashioned rolled oats
  • scant 1 cup hazelnuts, skins removed (buy them blanched or do it yourself) and roughly chopped
  • 1/2 cup puffed millet (or another puffed cereal)
  • 1/4-1/2 tsp sea salt
  • 1/3 cup plus 2 tbsp honey bzzzzzz
  • 3 tbsp coconut oil
  • 2 tbsp nut butter (I used my cashew macademia nut butter, but almond butter would be good, too)
  • 1 tsp vanilla

Directions:

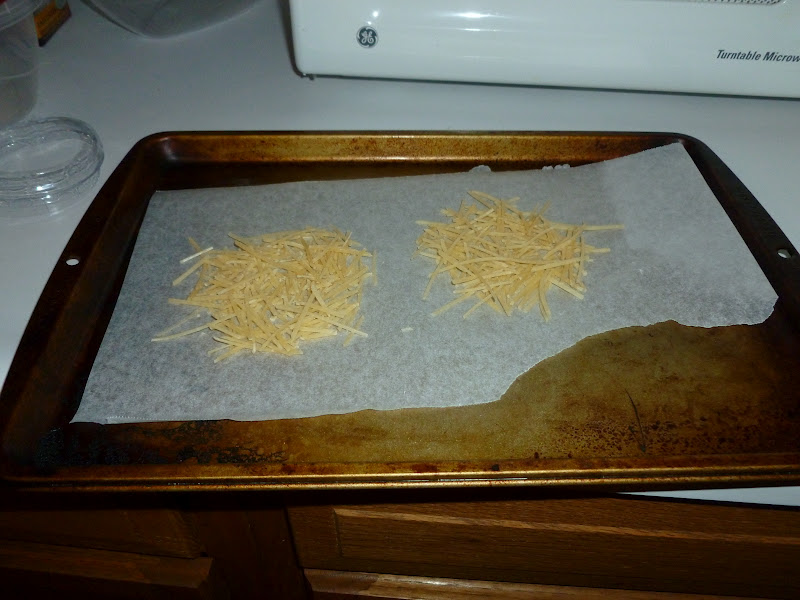
  1. Preheat the oven to 325 degrees fahrenheit.  Line a baking sheet with parchment paper.
  2. In a large bowl, mix together the oats, hazelnuts, puffed millet, and salt.  Set aside.
  3. In a small microwave-safe bowl, mix together the honey, coconut oil, and nut butter.  Microwave for 45 seconds, stirring halfway through.
  4. Stir the vanilla into the honey mixture.
  5. Stir the honey mixture into the oat mixture.  Stir thoroughly so that everything is well coated.
  6. Spread the mixture in an even layer on the baking sheet.
  7. Bake for 10 minutes, then flip or stir the granola around on the sheet.
  8. Bake for another 10 minutes, then stir the granola again.
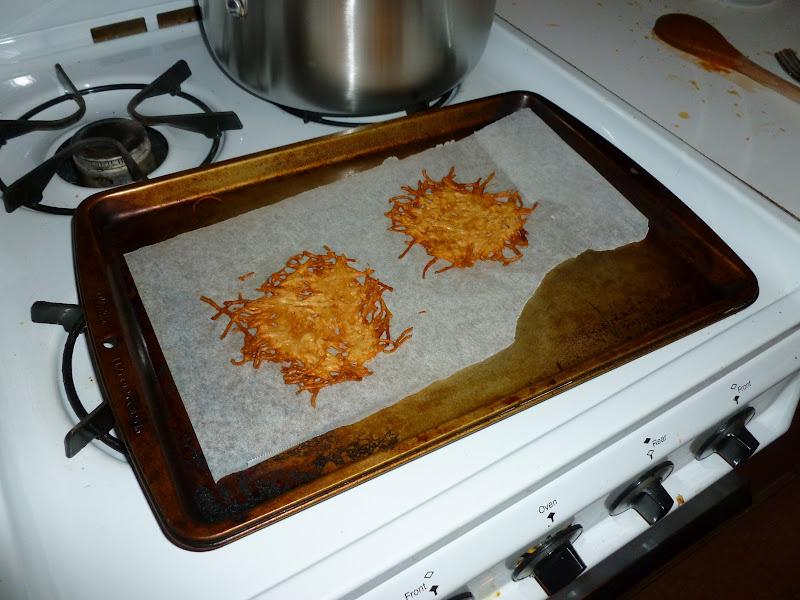
  9. Bake for 5-10 minutes more, watching carefully so that the hazelnuts don't burn.  You want the granola to look nicely toasted.  It will still be soft when you take it out of the oven, but don't worry, it will harden into clumps as it cools.
  10. Let the granola cool completely and then store in glass jars or air-tight plastic containers.
With this recipe, I had three jars full.  (Not counting all the granola I snacked on off the baking sheet...)

Enjoy plain, by the handful, or over top yogurt or ice cream!
Feel free to subzzzzztitute away!


Thursday, February 7, 2013

Savoring winter squash while I still can!

It's hard to believe that it's already February.  While spring is not too far away - what did the groundhog conclude? - the frigid temperatures I have been experiencing here make me think I will be stuck in winter forever.  Will it ever get warmer?

At least there are certain comforts associated with winter.  Hmm comfort categories...FOOD.  I suppose wool socks and voluminous sweaters count as comfort, too, but nothing rivals the comforts that food can bring.  What do I look forward to most in winter?  Squash!  All varieties.  Unfortunately, I'm already seeing the squash quantity and variety dwindle at the farmers market as the vendors sell the last of their reserves.  What will I do when these beauties can no longer be found at the market?

Just as the fantastic summer veggies must come to an end at the end of the summer, so too must the winter ones at the end of the winter.  While I see the dwindling squash count as a promise of spring around the corner - with fields of lush strawberries, bundles of green onions, and stalks of asparagus - I cannot help but be sad.  The only solution is to make the most of the squash while I can.  And I fully intend to do just that!  Here's a lovely butternut squash recipe.

Something that always amazes me at the farmers market this time of year is the incredible greens the farmers are able to grow.  For this recipe, I picked up some dinosaur kale, and last week I also got the most beautiful bag of spinach - dark, turgid leaves with the sweetest little taste; I eat the leaves plain, one by one, just as if I were eating chips.

Dear Mr. Butternut Squash,
I hope this is not our last recipe together of the season, but if it is, I am content knowing that we ended in such a delicious way.  Perfect memories to tide me over the spring and summer.
Love,
Fredeliciosa

Butternut Squash with Kale, Almonds, and Cashews
(Slightly adapted from Oh She Glows)

Ingredients:
  • 4 cups of butternut squash, cubed (3/4-1" pieces) (one small squash or half a large one, approximately)
  • 2-3 large cloves of garlic, minced (I used two mammoth sized cloves of particularly fragrant garlic, and I adored the garlicky-ness)
  • 1 tbsp olive oil
  • 1/4-1/2 tsp sea salt
  • 2 cups of kale, chopped (I used dinosaur/Lacinato)
  • 1/4 cup almonds, roughly chopped
  • 1/4 cup cashews, roughly chopped
  • 1 tbsp nutritional yeast
  • 2 tsp olive oil
  • 1/8 tsp sea salt

Directions:
  1. Preheat the oven to 375 degrees Fahrenheit.  Lightly oil a 8x8 Pyrex glass baking dish or an equivalent casserole dish or dutch oven (just something oven safe!).
  2. Put the squash, garlic, 1 tbsp olive oil, and 1/4-1/2 tsp salt in the dish and toss.
  3. Cover the dish with tin foil (or a lid if it has one) and poke a few holes in the foil.
  4. Bake covered for 35-40 minutes until the squash is tender.
  5. Meanwhile mix the almonds, cashews, nutritional yeast, 2 tsp olive oil, and 1/8 tsp salt in a small bowl.
  6. When the squash is tender, remove the foil/cover and stir in the chopped kale.  Sprinkle the nut mixture evenly over the top.
  7. Return the dish, uncovered, to the oven for 8-12 minutes until the nuts are nicely toasted.  Make sure you keep an eye on the nuts during this cooking time so you don't burn them!
  8. Remove from the oven once toasty and serve!
This dish goes fabulously with a piece of toast slathered with oozy, smelly cheese or a fried egg and sprout tartine.


Mmm big dish of yummy, colorful goodness!
There is no lack of color, flavor, or texture in this dish! 
Fire escape photoshoot.  Glam?  Edgy?  You decide.
Heehee the squash is practically the same color as my plate!
Some possible substitutions:

-If you are allergic to nuts, any seeds would work.  Pumpkin seeds would be particularly scrumptious, but sunflower and sesame also come to mind.
-If you don't have nutritional yeast, some grated parmesan or pecorino romano would be divine.
-Any leafy dark green could sub for the kale.
-Any sweet, firm squash you can find will work well.  And when good squash are no longer to be found, I imagine sweet potatoes will do.

So many possibilities, so little squash season left!


Thursday, January 31, 2013

Truly Hazelnut Rice Pudding

I have been thinking a lot about nut milks recently...blending nuts with water and getting milk, it's rather fantastique.  I have been meaning to try it out, but I don't currently have a "nut milk bag" or another appropriate filter.  (For those of you close to me reading this blog, please take the previous sentence as a major hint...Valentines day is coming up as you know.)  This led me to think, blending nuts with real cows milk would be even more fantastique (and yes, I understand this defeats the purpose of nut milk for vegans, people trying to avoid dairy, etc., but I am none of those currently, so it's allowed).  So with what to use this newfangled "nut milk"?  Rice pudding is the clear answer in my mind!  So creamy, dreamy, the nut flavors would get concentrated and infuse right into the rice.  Going along with the Italian-ness of using arborio rice in my rice pudding, I decided hazelnuts would be my nut of choice.

The result was fabulous!  True hazelnut flavor.  So rich and unctuous, just coating every taste bud in your mouth, each one reacting with "woww".

Truly Hazelnut Rice Pudding

Ingredients:
  • 2 pitted Mejdool dates*
  • 1/4 cup hazelnuts, skins removed (I think mine were slightly toasted)
  • 2 cups whole milk
  • 1/4 cup arborio rice
  • pinch of salt
  • 2 tbsp sugar* (I used my vanilla sugar...sugar that has been sitting in a jar with a vanilla bean)
  • 1/4 tsp vanilla extract
  • extra hazelnuts for serving

Directions:
  1. In a high speed blender (I used my Vitamix) on the highest setting, blend together the pitted (!) dates, hazelnuts, and milk until very smooth.  This took about 90 seconds for me.  I did not strain the mixture because it was super smooth.  If your blender doesn't get things quite so smooth though, I would suggest straining the mixture so that your finished rice pudding still has a silky texture.
  2. Pour the blended mixture into a small saucepan and add in the rice and a pinch of salt.
  3. Cook, stirring very frequently, for 25-30 minutes until the rice is nice and soft and the pudding has achieved your desired consistency.  I like mine goopy...not dry, not running.
  4. Off the heat, stir in the sugar and the vanilla.
  5. Taste and adjust the seasonings.  I noticed that the taste changed a lot from when the mixture was hot to when it was cold, so when you're adjusting the seasonings, think about whether you're going to serve the pudding hot or cold (if serving it cold, you may need to make tweaks later).
  6. Serve topped with chopped hazelnuts.
*I had initially intended this pudding to be sweetened by dates alone, but it was not sweet enough for a dessert with just the 2 dates, so I added a little sugar.  Next time, I will try 4 dates and omit the sugar.  However, this pudding with just 2 dates would also make a fabulous breakfast...the perfect wake-up amount of sweetness for the morning!

Lovely ingredients.  Make sure to take the pits out of your dates!
Rice going into the blended mixture of dates, nuts, and milk.
After about 27 minutes of cooking.  Rice is soft; perfect consistency.
The garnished bowl.
I apologize for the lighting in the next few pictures...less than ideal!
Spoooonful.  Holding perfectly to the spoon, creamy,
Have I enticed you yet?
One more, with better lighting this time, to tie it all up.  Now go make some!
I sit here writing and enjoying my bowl of rice pudding, going back to the kitchen between paragraphs for extra spoonfuls.  Tomorrow, I am going to try adding some cocoa powder or melted chocolate to the rice pudding...inspiration: Nutella.

I also can't wait to try this concept with different nuts.  Almonds perhaps with some cinnamon.  Pistachios perhaps with some cardamom.  Macadamia nuts or cashews - because of their high fat content - would give an extremely creamy product.  Dried fruits, zest, etc., nothing could go wrong with this pudding!

Saturday, November 3, 2012

Creamy Cauliflower Soup

The cauliflower: another lovely - yet often snubbed or underrated - vegetable that starts to pop up at the Farmer's Market this time of year.  Two weeks ago, I bought a cauliflower and roasted it with olive oil, salt, pepper, and Pecorino Romano cheese (similar method in recipe below), and it was delicious!  The sad part: I made the dish to bring to a dinner party.  Alas, I only got a small serving and found myself craving more.  The next week, I went right back to the booth selling these fantastic cauliflower and bought a second one.  While this one was slightly smaller, it was incredibly dense and yielded plenty of cauliflower-goodness.  Because it's soup season, I decided to turn this cauliflower into a creamy soup, still using the same roasting technique as the week before.  With a couple of warm, savory spices and lots of garlic, this soup is the perfect pick me up to a cold winter day...well it's not winter yet, but today it's around 34 degrees Fahrenheit, so I basically consider myself to be roughing winter already...and yet I resist taking my winter boots out of storage.

Ingredients:

  • 1 head of cauliflower, about 2 pounds, cut into florets
  • olive oil
  • 1-2 tbsp Pecorino Romano cheese, grated (parmesan would be a fine substitute)
  • half an onion, chopped
  • 1 huge clove of garlic, or 2 normal sized ones, roughly chopped
  • 1 carrot, copped
  • 1/2 tsp dried thyme
  • 1/2 tsp dried sage
  • 1/4 tsp dried tarragon
  • 1 bay leaf
  • 3-4 cups of vegetable broth (or a combination of vegetable broth and water)
  • salt and pepper to taste
Directions:
  1. Preheat the oven to 400 degrees Fahrenheit.
  2. In a large bowl, toss the cauliflower florets generously with olive oil.  Spread the florets onto a baking sheet in a single layer.  Sprinkle with salt and pepper.
  3. Roast the cauliflower for 30-40 minutes, flipping them every 10 minutes, until tender and lightly golden brown.
  4. Remove the cauliflower from the oven, sprinkle on the Pecorino Romano, and then return the cauliflower to the oven for 2 minutes.
  5. Once done, set the cauliflower aside.
  6. In a large pot, heat some olive oil over medium heat.  Add the onions and some salt.  Cook for 5 minutes or so, stirring often, until the onion is translucent.  Add in the garlic and carrots.  Allow to cook for another 5 minutes on medium-low heat, stirring often.
  7. Add the roasted cauliflower, thyme, sage, tarragon, and bay leaf to the pot.  Add in enough vegetable broth (and/or water) to cover all the veggies.  I didn't measure precisely here, but 3-4 cups is a good estimate; I used about a 2:1 ratio of broth to water.  Stir well.
  8. Bring to a boil, reduce to a simmer.  Allow to simmer for 30-40 minutes until the carrots are tender.  Turn off the heat
  9. Cover the pot and let it sit on the stove (no heat!) for a few hours until it has cooled a bit.  This will also help give the flavors more time to marry.
  10. Remove the bay leaf (don't forget!!).  Transfer the contents of the pot to a blender or food processor, or use an immersion blender.  Blend the soup to your desired consistency.  Taste and add more salt/pepper, spices, or broth/water if necessary until you get the product you want!
  11. Reheat and serve warm, perhaps with a lovely piece of toast and cheese!
Yes, this photoshoot happened on my fire escape...it was the only place I could get some good natural light without actually having to leave the house and go outside in the frigid cold!  Artsy, no?
Reserve a few pieces of roasted cauliflower for a simple yet elegant garnish!

I bought a large bag of sprouts from the Farmer's Market last week; I can't remember what kind of seeds they were exactly, but it wasn't your boring old alfalfa.  The man who sold me the sprouts recommended I try adding them to soups as a garnish at the end.  This was a fantastic suggestion!  Those spouts are wonderful atop this cauliflower soup, adding a little crunch and freshness.  ...and now I just add sprouts to everything I eat...

Friday, October 19, 2012

My Namesake

It's official: I am a Farmer's Market groupie.  I'm there multiple times every weekend, often just walking aimlessly through the pavilion, gawking at the pretty produce.  I stalk their page on Facebook.  I follow all their announcements.  I am obsessed.  But it's a happy obsession, and I'm proud to say that I have increasingly fostered relationships with my farmers.  It's a lovely feeling to know the people who put their time and love into growing your food.

To get back to my Farmer's Market-Facebook-stalking.  Imagine how delighted I was to see the photo-post that Brussels sprouts were finally in season and available at the market!  I saw the post on Saturday night and found it hard to fall asleep with all the excitement - in the morning I could go get my choux!  (Sorry, I must interrupt here.  Brussels sprouts are part of the cabbage family.  I thought I would throw this in here because my friend who is a self-proclaimed cabbage hater has Brussels sprouts listed as one of her top vegetables...she, along with many others, had no idea they were cabbage!)  As soon as I got to the market, I made it my mission to find the Brussels sprouts.  I was in such a mode of intensity that I initially walked right by them!  Luckily, my friend was with me and pointed them out.   Phew.  I eagerly chose a stalk (yes, they come still on the stalk), and cherished it as my new pet...well that's a little weird to say because I would eat them soon enough, but I really did have a lot of affection for these little sprouts.

Isn't he gorgeous?  If it were more cost-effective, I would definitely buy a dozen of these stalks as decoration!

So cute and green.

Nutritious, delicious, and beautilicious?

The problem with cooking one of your all time favorite veggies: you devour them before any photographs can be taken.  This was the case of these Brussels sprouts.  Here is the recipe anyways!

Brussels Sprouts with Figs and Balsamic

Ingredients

  • 30-40 small Brussels sprouts (about 20 big ones, cut in half), stems trimmed and any dry leaves removed
  • 1 tbsp olive oil
  • 4 fresh figs, each cut into 6 wedges
  • 1 clove garlic, minced
  • 1-2 tbsp balsamic vinegar
  • salt and pepper, to taste

Directions

  1. Preheat your oven to 400 degrees Fahrenheit.  I decided to use an 8x8" Pyrex baking dish that I lined with aluminum foil, but I imagine a baking sheet or forgoing the foil would be just fine - use your favorite roasting apparatus, but be aware, it may change baking times. 
  2. In a medium bowl, toss the Brussels sprouts with the olive oil and some salt and pepper.  Pour the sprouts into the lined baking dish.
  3. Place the sprouts in the oven for 10-15 minutes.
  4. Meanwhile, toss the chopped figs and garlic into the medium bowl used previously and add the balsamic vinegar and a little more salt and pepper.  Stir so all the figs are coated.
  5. After the sprouts have had a head-start in the oven for 10-15 minutes, remove the dish.  To the dish, add the figs and the balsamic that remains at the bottom of the bowl.  Give it all a good stir so that things are well-incorporated.  
  6. Return the sprouts/figs to the oven and roast for another 40 minutes, until the sprouts are tender and slightly browned.  Check every 15-20 minutes and stir.  (Roasting times here may vary, so you want to keep an eye on the sprouts and figs.)
  7. Enjoy over quinoa, rice, or millet (or a combination as I love to do!).  I also found this dish to be amazing accompanied by a little garlicky humus.
I would be interested to see if I could make this recipe work with dried figs...I might have to first cook them down with some water into a compote of sorts and add it later in the baking, but it might just work!

Sunday, October 7, 2012

Tomato Soup Two Ways

There is one very big advantage to being back at school: the tomatoes at the Farmer's Market here are magical.  They are so sweet, and there are so many lovely varieties.  Week after week, they keep coming.  Yes, they will eventually end, but I find it amazing that even in October I can still get firm and flavor-packed tomatoes.

To take full advantage of tomato season, I made two different tomato soups...all the while eating pint after pint of cherry tomatoes of all colors.

The first soup came about after a conversation with my favorite tomato vendor.  I asked him what the best tomatoes would be for a soup...and the conversation evolved into him spilling his tomato soup secrets...

Slightly Spicy Roasted Tomato Soup
(inspired by my tomato vendor)

Ingredients:

  • 3 pounds beefsteak tomatoes, cut in wedges
  • 1 poblano pepper, seeds and ribs removed, cut into large pieces
  • 1 onion, cut into wedges (keep the layers together)
  • olive oil
  • salt and pepper
  • 3 cloves garlic, don't peel!
  • 3-4 cups vegetable broth
Directions:
  1. Preheat the oven to 375 degrees Fahrenheit.
  2. Place the tomatoes, pepper, and onion on a baking sheet.  Drizzle with olive oil and then sprinkle with salt and pepper to taste.
  3. Wrap the unpeeled garlic in tin foil (make a little packet) and add it to the baking sheet.
  4. Bake the vegetables for about an hour, to your desired roast-i-ness.
  5. Transfer the vegetables and their juices to a bowl and allow the vegetables to cool.
  6. Open the foil packet and peel the skin off the garlic.  Add the garlic to the rest of the vegetables.
  7. Transfer all the vegetables to a blender or food processor.  Add 3 cups of vegetable broth.  I managed to (barely) do this in one batch, but you may need to do two.
  8. Blend to your desired consistency.  I made mine very smooth.  Add more broth if it is too thick.
  9. Pour the soup into a large pot and heat it over medium high heat.  Reduce the heat to low and let the soup simmer for twenty minutes or so.  Taste and adjust the seasonings.
  10. Top with a parmesan crisp (see below) and eat hot or cold - both are delicious!
Oven-ready.

Roasted to perfection and ooozing juices.  The flavors have had an hour to mingle and marry inside the oven, yum!

This garlic was so sweet and sticky after being roasted!  Amazing smells coming from this packet, too.

Everyone in the bowl to rest for a while.

Yes, I filled the VitaMix to the brim...maybe not the smartest thing to do, but it worked like a charm!

Gorgeous gorgeous color.

Parmesan Crisps

Ingredients:
  • shredded parmesan
Directions:
  1. Preheat oven to 375 degrees Fahrenheit.
  2. Line a baking sheet with parchment paper.  Sprinkle parmesan into 3-inch circles on the parchment paper.  Make as many as you like.  I found that they even stayed crispy on day two after being stored in a plastic baggie.
  3. Bake for 5-10 minutes, checking after 5 minutes and keeping a close eye to make sure they don't burn.  You want the cheese to melt and become slightly crispy and golden.
Easiest recipe: all you do is sprinkle the cheese and bake!

Nice and golden.  
A cheesy, salty crisp for my slightly spicy soup.  A perfect pairing!
I was so in love with this soup - and correspondingly so depressed the day after I finished it all - that I knew I needed to make another one.  Obviously, it wouldn't be the same recipe.  I decided to go in a completely different direction.  While the first soup was rather naked, this soup was dressed up with some spices and coconut milk.

Coconut Curry Tomato Soup
(adapted from Oh She Glows)

Ingredients:
  • 2 1/2 pounds tomatoes (I used 1 1/2 inch round tomatoes...I forget what they were called)
  • 1 small onion, sliced but layers kept together
  • olive oil
  • salt and pepper
  • 3 large cloves garlic, don't peel!
  • 1 cup coconut milk
  • 2-3 cups vegetable broth
  • 1 heaping tbsp tomato paste
  • 1 tsp curry powder
  • 1/4 tsp nutmeg
Directions:
  1. Preheat oven to 400 degrees Fahrenheit.  Line a baking sheet with tin foil.
  2. Slice the tomatoes in half and arrange cut side up on prepared baking sheet.
  3. Sprinkle with salt and pepper.
  4. On another baking sheet (line if you wish), arrange the onion slices and drizzle with olive oil.  Sprinkle salt and pepper on top.
  5. Wrap the unpeeled garlic in tin foil (make a little packet) and add it to the baking sheet with the onions.
  6. Place the tomatoes, onions, and garlic in the oven.  Roast for 30 minutes and then check the onions.  Take them out if they are starting to brown but leave the garlic in the oven.  Roast the tomatoes and garlic for a total of 1 hour or so.
  7. Remove the roasted vegetables from the oven.  Place them and their juices in a large soup pot.  Peel and add the roasted garlic.
  8. Add the coconut milk, 2 cups vegetable broth, tomato pastes, curry powder, and nutmeg to the soup pot.  Stir well.  
  9. Bring the soup to a boil over high heat and then reduce to a simmer.  Simmer for 15 minutes, stirring often. 
  10. Allow the soup to cool to lukewarm and then transfer to a blender or food processor.  Blend to your desired consistency.  You may need to add more broth if the soup is too thick.
  11. Check the seasonings.  You may need to add some more curry powder, salt, or pepper, to your liking.
  12. Serve hot or cold with some yummy toppings...may I suggest toasted cashews and homemade croutons?
Pretty tomatoes...and they amazingly all fit perfectly on the sheet!  This made me extremely happy :)

All roasted!

Close up.

After simmering...smells so yummy!

Ready to blenddd.  I added more veggie broth after the first blending.

Back to the stove to heat up.

Topped with toasted cashews and croutons (rye and raisin bread drizzled with olive oil and toasted in the oven then spread with extra roasted garlic I had made).

So creamy and filling.  An absolutely satisfying meal with a unique flavor combination!

Both soups were amazing and very very different, but it's hard to say which one I liked more!  The great thing was that these soups tasted fantastic both hot and cold, which was very handy for the end-of-summer scorcher days, mixed with beginning-of-fall night chilliness.

And now it's October, which means it's time for squash soups of all sorts!  Ah soup, I do love you so...

Wednesday, October 3, 2012

End of Summer Summary

As is evidenced by my complete lack of posting in the last two weeks months (...started writing this post a good month ago and never finished it), I am, once again, back at school.  The last week of summer was so filled with cooking and hanging out with friends from home (and I suppose packing...) that I never sat down to blog about anything I made.  Let's just say I cooked a lot in that last week, and I even had a lovely dinner party.  Here's a recap of some of the yummies that went into my tummy in that last week as well as some other random dishes from earlier in the summer that I never blogged about...

Let's start with the dinner party because it was absolutely fabulous!  Inspired by Julia Child's 100th birthday (and p.s. I am now reading her new biography "Dearie"), I decided to make coq au vin.  This was my first time ever following a Julia Child recipe word-for-word (...well I thickened the sauce with cornstarch rather than flour for a gluten-free friend).  Yes, I even flambe-d the chicken with some cognac...and managed not to burn the house down).  I had shied away from Julia Child ever since a melt down ensuing from trying to follow her confusing directions for the cake base of a buche de noel.  I am proud to say, however, that the coq turned out splendidly!

Green beans tossed in olive oil, salt, and pepper, and then sprinkled with shredded parmesan and roasted!

Coq au vin...my apologies that it is not the most photogenic dish...but it was yummy.

Basil mashed potatoes.

Vegetable Tian.  Zucchini, tomato, summer squash, eggplant, and potatoes with caramelized onions on the bottom and topped with plenty of gruyere and fresh thyme.

And then there was the fluffiest multigrain bread I made from Peter Reinhart's recipe...and the most fabulous sandwich that resulted from it.

I only made a half recipe...but it rose so well that I got two huge, puffy loaves!
And now the sandwich: sauteed eggplant, basil, tomato, and fresh mozarella...toasted and melted to perfection!
And then there was vegetarian lentil and swiss chard shepherd's pie...

Beautiful swiss chard and lentils sauteed with some balsamic...

...and topped with mashed potatoes and baked!
And then a most fabulous breakfast...

My multigrain bread put to use again...French toast stuffed with Fromager d'Affinois and topped with the fruity center of some left over blueberry crisp (from the coq au vin dinner party)
And vegetable ice cream?  I did it again!  (Remember the delicious and so pretty pink beet ice cream I blogged about a few months ago?)  Thanks to corn's natural summer sweetness...

Sweet corn ice cream, inspired by my most recent trip to Oleana.  If I may say so, I think my sweet corn ice cream turned out better than theirs; it was certainly creamier whereas theirs had a little bit of icy-ness.
And who doesn't like a new cookie recipe?

Walnut blueberry jam thumbprint cookies.  Such a buttery base with a lovely crunch from the walnuts and sweet hint from the jam!
And then a spicy flair...  One of my biggest struggles this summer was finding out what to do with all our CSA jalapenos!  Unfortunately, I learned the hard way that my skin is especially sensitive to jalapeno spice...from now on, gloves.  Always.

Jalapeno corn muffins make the perfect accompaniment to a big bowl of sauteed peppers, corn, and carrots with oregano and cumin.
And after several days culturing my sourdough starter, I made two different breads:
(Unfortunately, I forgot to freeze my starter at home before coming back to school...and I was informed that it was thrown out after a few weeks as it was developing some sort of scary black spores.  Sorry starter dude.)

The first bread.  Just a simple sourdough, nothing fancy, but such a lovely sour hint and a crispy crispy crust.
The second bread.  A Poilane-style miche.  Made with lots of whole wheat flour, which made the flavor more complex than the plain sourdough bread...plus the extra time for my starter to develop certainly added to the flavor punch.

And what is better than visiting a farm stand in the middle of the summer and buying nectarines?


Perhaps making them into a salad with green beans, avocado, radishes, and hemp seed all dressed with a light lime and cumin vinaigrette!
And how does one dress up a beautiful head of cabbage?

With some curry powder and kefir of course!  Sitting on a bed of spinach and topped with toasted cashews, this was a very satisfying and super nutritious meal.
And after shelling our cute little CSA peas, I decided they were to be hummus-ed.

Sweet peas with some white beans, tahini, salt, pepper, garlic (oops can't remember what else was in there...lemon juice probably?), served aside homemade superbly seedy crackers (Oh She Glows Endurance Crackers).
Finally, at times, our CSA supplied us with outrageous amounts of scallions...these scallion meatballs were the perfect solution!

Scallion meatballs (made with dark meat ground turkey) atop a bed of bamboo rice (Yes, it comes green because it has been infused/grown in bamboo juice!!  I know, so cool.) with sauteed radishes and a drizzle of glaze (ginger, soy sauce, mirin, brown sugar, basically.  delicious.).
Well there's a little summary.  I wish I had had the time to write about all these dishes in full length posts because I have so many pictures for each of them!  Hopefully I've learned my lesson...  Oh well, at least these dishes finally made their way to the blog.  If you would like the actual recipe for any of these, just post a comment, and I will reply with all the information!

Let's see how well I can keep up in these next few months...  Just know, even if I'm not blogging, there's plenty of cooking going on, and my brain is always (and I mean always) swirling with food ideas!