Saturday, February 25, 2012

Ode to unwanted, beautiful bananas

So who knew that February 23rd was National Banana Bread Day?  I certainly didn't!  It was only by browsing Foodgawker.com on Thursday that I found this out.  However, subconsciously I must have known because this past weekend I made banana cupcakes, which turned out to be just like banana bread but much lighter and fluffier.

I am one of those people who likes my bananas nice and spotted.  Any green on the banana?  It's not ready to be eaten!  Sadly, many people think that browning bananas are gross and diseased...i.e. they think they've gone bad?  I cannot tell you how many beautiful brown bananas I have seen cast in the trash here!  It's absolutely criminal.  So last weekend, I spotted in the dining hall several very brown bananas.  Knowing no one would adopt them, I took them with me.  I couldn't let them go.  They needed to fulfill their banana destiny and fulfill it they would in these delicious and oh so cute banana cupcakes.

Note: I made these in a moment of utter weakness...I was supposed to be either 1) studying for my genetics exam or 2) preparing for my pathogenic bacteriology presentation.   When it comes to baking, I just have no self control.  I saw this recipe, and had had had to make it despite my lack of time.  I have no regrets; it was totally worth it.  These were scrumptious and much appreciated by my friends in the building.  A shout out to my friend, Aarti, for being my helper and for doing such a lovely job squishing the bananas.  Another shout out to the boys in the suite on the fourth floor for lending me their oven mitts. 

Speaking of oven mitts, Caroleen just bought me the most adorable potholders...pictures to come in a separate post because they are just so beautiful that they deserve their very own spotlight.

Banana Cupcakes with a Banana Hat
(adapted from Crepes of Wrath)

Ingredients:
  • 1/2 cup (1 stick) butter, melted and cooled
  • 1 1/2 cups mashed very ripe bananas (the browner the better!), about 4 bananas
  • 2 eggs
  • 1/2 tsp vanilla extract
  • 1 1/2 cups all-purpose flour
  • 3/4 cup sugar (I substituted 1 tbsp of normal sugar with 1 tbsp cinnamon sugar...or just use normal sugar and add 1/2-1 tsp of cinnamon like the original recipe calls for)
  • 1 tsp baking powder
  • 1/2 tsp baking soda
  • 1/4 tsp salt
  • 1 ripe banana, cut into 16 slices, for decor
Directions:
  1. Preheat the oven to 350 degrees Fahrenheit.  Line muffin tins with paper liners.  I made 16 cupcakes of good size.  I think it would be risky to do only 12, but if you aren't too worried about overflow, go ahead and try.
  2. Beat together on medium speed the melted, cooled butter, mashed bananas, eggs, and vanilla until well combined.
  3. Add in the flour, sugar, baking powder, baking soda, and salt.  Beat on low until smooth, but do not over-mix.
  4. Drop about a 1/4 cup of batter into each muffin cup.
  5. Place a sliced banana gingerly on the top of each cupcake before putting them in the oven.
  6. Bake for 25 minutes until a knife poked in the center comes out clean.
  7. Let cool for a while in the muffin tin and then remove to cool completely.  If you don't like to wait for complete cooling, these taste great warm!  But they taste great cooled, too!
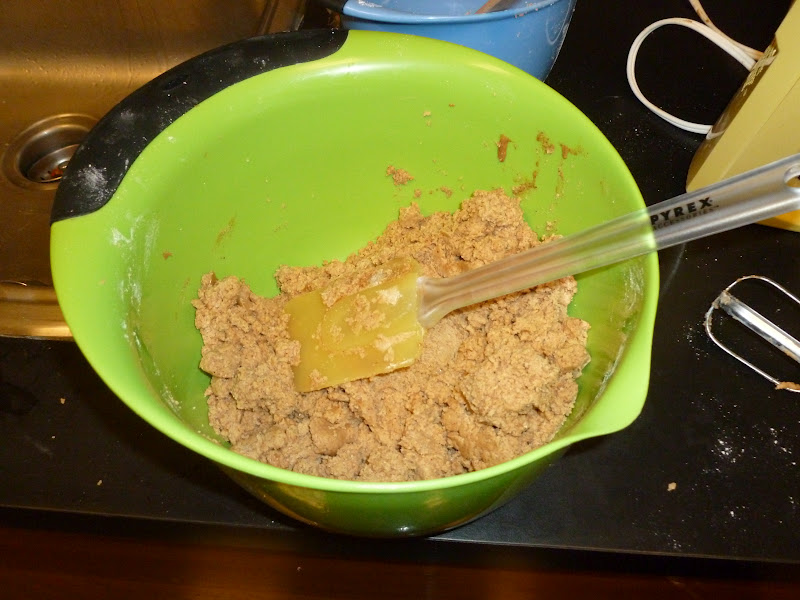
All mixed up.

Everyone got a hat, ready to go into the oven!

So cute.  I love simple, edible, natural, and elegant decorations...so much better than frosting!

These smelled sooo good as they were baking.

Perfectly golden.

Some tipped their hats a bit...gave them a little extra personality, I'd say!

So moist and fluffy on the inside with that cozy banana yumminess.  There's something so comforting about banana bread...or here, banana cupcakes.

So I hope everyone had a very happy National Banana Bread Day, even if you didn't know it was happening!

Saturday, February 18, 2012

Chilifest!

Leave it to this town (fine, city) to convert a chili-hater into a chili-lover in just one afternoon - $5 - 5 tastes of chili...and then oh yes, a chili chocolate...$1 more I guess.

This was my first Chilifest experience, and it was fantastic.  Such a fun atmosphere and delicious small bites!  The lines were terribly long, but they moved quickly as chili is quickly served.  In fact, the long lines and chili samples were a match made in heaven.  Here's how it goes: first you must stand in a long line to exchange your cash for tickets; this is not the fun part, but it's well worth the wait.  Tickets finally in hand, you get in line for your first sample of chili.  Finally at the front of the line, you take a much anticipated bite - yumm!  With your chili sample still cupped gingerly in your hands, warming you, you start perusing the surrounding booths or consulting your chili map to see where your favorite vendors are located.  As you walk in the frigid air and wind, you snack happily on your chili as the hot, spiciness warms you from the inside out.  When you find your next desired booth, you stand in the long line, enjoying the last few bites of your preceding chili sample.  After you are done with that sample and ready for the next, you are just a minute away from the front of the line, just enough time to savor and ponder the chili you just ate.  You get your next sample and repeat until all your tickets are gone.  At that point you make a sad face, but you quickly recover as you spot the chili chocolate stand!  You get right back in line at the ticket booth and beg them to sell you just one ticket more (they are normally sold in sets of 5).  Having convinced them, you grab your extra ticket and run over to the chocolate!  Yumm, it was oh. so. worth. it.

Sadly I must wait a full year before I can experience it again.

My first stop straight ahead!

GreenStar's Grilled Yardbird (Chicken) and White Bean Chili

The Mate Factor's Grass Fed Local Beef Tribal Chili

Stella's Spicy Sirloin and Stout Chili

Crooked Carrot's Crooked Con Carne (local beef, beans, onions, peppers, carrots, and tomatoes...and a pickled carrot!)

Just a Taste's Bison and Pork Chili

Life's So Sweet Chocolate's Spicy Vindaloo Truffle

Spicy and sweet, bursting with Indian spices...such a unique treat and a great way to round off a chili lunch...although this by no means cooled down my palate!

Sometimes, you've just gotta love this place.

(Of course on my way back up the hill there was a mini freak rain then snow storm, but that's to be expected.)

Fun fact: you were given a spoon when you bought your tickets and no more after that!  So environmentally friendly :)  I even saw many cool people bring their own mugs and spoons...smart idea too because they probably got even larger samples!  However, I must say the part that made this a great experience was the small samples...I didn't get stuffed!  Just pleasantly satisfied with my chili.  Too much of a good thing can be bad; I'm glad I avoided that.

Friday, February 17, 2012

Bringing Glory to Chocolate Chip Muffins

...by making them Belgian Cote d'Or Double Lait Praline Muffins

To continue with our Sunday night de-stressifying, lab-meeting baking, last week Brenna and I made some delicious muffins.  Muffins are so simple to whip together and so scrumpdidillyumptious.  We thought, who doesn't like a good ol' chocolate chip muffin?  I can't think of anyone personally...  But we wanted to make these even better than the classic!  Luckily, I still have several bars of delicious Belgian chocolate from my last shipment from Daddy, and I will be receiving more chocolate within a week or two...so it was the perfect time to use my bar of Cote d'Or Double Lait chocolate.


The star of the show.
I don't normally like milk chocolate straight up, so I wasn't planning on eating this bar by itself.  Putting it in a muffin (especially a recipe like this one where the batter isn't too sweet) was the perfect application.  The result was divine!  Oh how I wish I had one to munch on right now...

Belgian Cote d'Or Double Lait Praline Muffins
(adapted from Two Peas and Their Pod)

Ingredients:

  • 2 cups all-purpose flour
  • 1/3 cup light brown sugar
  • 1/3 cup granulated sugar
  • 2 tsp baking powder
  • 1/2 tsp kosher salt
  • 1 stick (1/2 cup) butter, melted and cooled
  • 2 eggs
  • 2/3 cup milk
  • 2 tsp vanilla extract
  • 1 1/4 cups chopped Cote d'Or Double Lait chocolate (or substitute with some other delicious Belgian chocolate)
Directions:
  1. Preheat the oven to 375 degrees Fahrenheit.  Put paper liners in your muffin tin(s).  (We made 16 muffins that came up to just above the paper when baked.  I would predict that you could make 12 muffins if you wanted to without any overflowing catastrophes.)
  2. Mix together the flour, sugars, baking powder, and salt in a medium bowl and set aside.
  3. In another medium bowl, mix together the cooled, melted butter, eggs, milk, and vanilla extract until well combined.
  4. Make a well in the center of your dry ingredients and pour in the wet.  Stir until just combined!  A few lumps are ok...it is imperative that you do not over-mix though!
  5. Stir in the chopped chocolate.
  6. Spoon into your paper-lined muffin tins.
  7. Bake for 18 to 20 minutes until a knife/toothpick poked in the center of a muffin comes out clean.
  8. Allow to cool for a few minutes in the tins and then remove to allow to cool completely.

The set-up.

Dry and wet, ready to go.

Action shot.  Shoop.

Don't over-mix or your moooofins will be tuff stuff!

Hello, beautiful chocolat.

Ready to be plopped into muffin tins.

Almost forgot to photodocument the before-baked muffins!  Luckily I remembered just after we closed the oven door.

16 muffins (the other 4 were in another pan) makes just the perfect sized muffins in my opinion, but if you want mushrooming, pillowy muffins, dividing the batter into just 12 cups should do that for you.

Waiting for these beauties to cool was a painful process...

...couldn't wait very long...we tried one warm, and it was delicious.  Ooey gooey, sweet chocolate pieces enveloped by a spongy, moist and vanilla-y crumb.


Almost as painful as waiting for them to cool: just eating one and saving the rest for the lab people...at least we each grabbed a second one the next day before they disappeared (and disappear they did, poof!).

Not exactly sure what this week's weekend baking holds in store...perhaps chocolate? perhaps another muffin recipe?  Stay tuned because you know it's gonna make you drool!

Friday, February 10, 2012

Dough Balls Galore

Continuing with baking for birthdays and lab meetings, last week Brenna and I made Peanut Butter Dough Balls.  Unsatisfied with the offerings at our little grocery store in the Commons, which is only a mile walk away, we schlepped another 0.6 miles to our absolute favorite market.  It was well worth the extra walking time, and the weather was in fact decent!  The only thing we didn't consider was the weight of certain things we bought (almond milk, yogurt, etc.).  Thus, our shoulders aching, we admitted defeat on the way back and took a bus up the hill.

It was a long adventure to put these dough balls together, but the minute we tasted one, we knew it was well worth it.  As soon as we took a bite, all we could say was "mmmmmm".

And they were extremely popular at our lab meeting!  Every last little ball was eaten, and there was even a request for more!

Peanut Butter Dough Balls
(adapted from peas and thank you)

Ingredients:

  • 1/2 cup (1 stick) salted butter, softened
  • 3/4 cup plus 1 tbsp natural, crunchy, salted peanut butter (my heart belongs to Once Again Nut Butters)
  • 1/2 cup light brown sugar
  • 3/4 cup powdered sugar
  • 1/2 tsp vanilla extract
  • 1 tsp baking powder
  • 1/2 tsp baking soda
  • 1//2 tsp kosher salt
  • 1 cup whole wheat pastry flour
  • 1/2 cup all-purpose flour
  • heaping 1/2 cup natural peanut butter chips
  • heaping 1/2 cup semisweet chocolate chips


Directions:

  1. Using a mixer (stand or hand-held), cream together the butter, peanut butter, sugars, and vanilla in a medium bowl until very smooth.
  2. In a small bowl, mix together the baking powder, baking soda, salt, and both flours.  Stir to combine.
  3. Add the dry mixture to the butter mixture, a little bit at a time, until fully incorporated.  Do not over-mix!  (If the dough looks too dry and crumbly, consider adding more peanut butter or some sort of liquid...milk, almond milk, etc.)
  4. Add in both kinds of chips and stir to combine.
  5. Chill the dough in the refrigerator for 30 minutes.
  6. Preheat the oven to 350 degrees Fahrenheit.
  7. Once the dough has chilled, use your tablespoon measure to pack a heaping tablespoon of dough for each ball.  Then, roll the ball in your hands until it is cute and round.  Make sure to really pack it tightly so it doesn't crumble apart.  Place the dough balls on a baking sheet.  They won't really expand or flatten out, so you can put them pretty close together
  8. Bake for about 12 minutes until the tops are no longer too sticky.  Don't over-bake!  Let the dough balls cool on the baking sheet.
  9. Bite into a dough ball and just let yourself say "mmmmm".

The spread.

Brenna's beautiful new mixing bowls deserved a photo shoot.  Pretty pretty colors with a fabulous grippy bottom (excellent for our vigorous mixing), grippy handle, and easy-pour spout!
Wet stuffs.

Dry stuffs.


Creamy creamy and smelling fantastique!  We probably could have just stopped here and eaten the whole bowl...

...but we resisted and incorporated the dry ingredients.

Generous addition of chips.

Mixing this all together took some serious arm work.

Balls all lined up.

Doughy doughy.

Just out of the oven.  Whoops we smooshed that little guy in the front a bit...we really need to invest in real oven mitts so that we don't keep using unwieldy paper towel wads and smooshing cookies on the edge of the pan.

Yummms.

Soft and gooey inside.

Another close-up glamour shot, courtesy of Brenna's iPhone and special picture-beautifying app.

Hmm...what shall we make next?  It's going to have to be fabulous to top these dough balls!

Thursday, February 9, 2012

Easy Bake Oven: University Edition

I should be taking advantage of my (rare!) light workload tonight by getting an extra bit of sleep, but I'm too excited about this!

My first microwave cake!

I've seen lots of recipes for microwave mug cakes over the years, but I was always skeptical and thought that if I had time to put together a batter, I might as well do it right and bake it in an oven.

I don't know what it is...perhaps the lack of sleep or stress of being back at school with actual work to do...but I am always, always craving desserts, especially chocolate-y ones, these days.  Now, I've always had a bit of a sweet tooth, but it has become much more prominent in the last few weeks.

After a long day/week, all I could think about as I sat at my desk, reading my genetics book, was "I want cake.  I want chocolate."  So I typed "mug cake" into the Foodgawker search bar, and stumbled upon the perfect recipe.  I had all the ingredients, and it looked delicious!

So here it is:

Chocolate Banana Almond Butter Microwave Cake
(adapted from The Wannabe Chef)

Ingredients:

  • 1 very ripe banana
  • 1 tbsp crunchy almond butter
  • 2 heaping tbsp cocoa powder
  • 1 glob of honey (perhaps this was about a tsp?)
  • 1 egg
  • half a handful of chocolate chips 

    Directions:
    1. In a medium bowl, mash the banana with a fork until you have a smooth puree.
    2. Add in the almond butter, cocoa, and honey.  Mix well.
    3. Add in the egg and mix until you have a beautiful batter.
    4. Stir in the chocolate chips.
    5. Pour the batter into a microwave safe bowl.  (I used a small Pyrex bowl.)  Make sure the bowl is not more than 2/3 full as the cake will rise up a bit.
    6. Microwave on high for 3-3 1/2 minutes until the middle of the cake is completely set.
    7. Eat it right out of the bowl or flip it out onto a plate!
    Pre-nuc.

    Post-nuc.

    Middle completely set.  Be careful, the bowl will be hott!

    I was surprised by how easily this cake unmolded from the Pyrex bowl!
    Chocolate-y, banana-y, spoonful, full of little crunchies from the almond butter...and the melted chocolate chips...all I can say is mmmmmmmmmmm.

    Just the right amount of cake-iness and gooey-ness.

    The great thing about this cake is that there are so many possibilities for variations on the recipe.  Next time, I think I'll try peanut butter instead of almond butter.  And perhaps after that I'll use applesauce instead of banana.  Walnuts or dried fruit would also be amazing mix-ins.  See, I could go on and on.  Simply put: I will be eating lots of cake this semester. 

    Another great thing about this cake (I will keep raving about it until I make myself stop typing): it has all the components of a good breakfast...aka I will be eating the second half for breakfast tomorrow morning.  A banana (perfect complement of vitamins and minerals to start your day off right), almond butter (protein and good fats), egg (the miracle egg! excellent protein and full of nutrients), chocolate (for that little caffeine boost we all need in the morning), and honey (to get you in the mindset of being a busy busy bee!).


    A burning question: can it be called baking a cake if you are just microwaving it?  I think not.  But then this brings up the issue: is using an Easy Bake Oven really baking? is it really an oven?  I leave you to ponder this, and get back to me because I am curious.

    Bedtime?  Dreaming of cake tonight is inevitable.

    Saturday, February 4, 2012

    Weekend Eggs

    I am a huge fan of eggs in their many forms.  I am, however, very picky about where my eggs come from.  It brings me no joy to eat an egg from a sad chicken.  My eggs must come from happy, lively chickens.  Therefore, I never eat the eggs from the dining hall (who knows how those poor chickens were treated!).  Luckily, the Farmers Market is filled with various organic, free-range chicken egg vendors.  In order to get my egg-fix while at school, I picked up a dozen the last time I was at the market.  For simplicity's and time's sake, I first hard-boiled a few.  Yum yum.  But hard boiling is not my favorite egg preparation.  I wanted to scramble them!  After stealing some butter from the dining hall (I was too lazy and stingy to go buy my own olive oil or something), I was determined to have a scrambled egg and toast this weekend.  Although I did not toast the bread in the end (I used some potato rosemary bread I had frozen), I did add some delicious, stinky cheese I got from the Farmers Market.  Such a satisfying breakfast.  Hopefully it will energize me for attacking the piles of work I have sitting on my desk and mocking me.

    Scrambled egg and cheese on potato rosemary bread = a match made in heaven, excuse my trite expression.

    And because I am a biology major and completely obsessed with the periodic chart I have on my wall, I simply had to ponder which compounds were in my eggy, cheesy breakfast.  Hmm...

    What's inside?

    Blondies by Brunetties

    The goal of this semester: bake and post.  bake and post.  bake and post.  And of course I suppose there will be some (why do I even kid myself, LOTS) of studying in between.  My darling friend and fellow baking and blog-reading enthusiast, Brenna, has agreed to embark with me on weekly (this is optimistic, but we're going with it) baking adventures.  And what puts the cherry on top of these adventures?  We have a very receptive weekly food-consuming bunch: lab people at lab meetings.  Not only will we relieve our own stress by baking, we will also make the lab-ers smile each week...and if all goes according to plan, with no baking flaws, we will become very popular.  Evil plan?  no.  How could anyone say cookies are evil?

    Ok so I just have to post this somewhere so that I don't forget in my old age.  The day Brenna and I were going to make these blondies, there was a real fire emergency in the kitchen on the floor below me.  Some not-so-kitchen-savvy-student set his/her dishtowel on fire.  Simply put, the dorm smelled like burnt sugar (why the flaming towel smelled like burnt sugar I will always wonder), and we were stranded outside for thirty minutes as the lovely firepeople came to save us from the burning dishtowel.

    We did not let this deter us from baking that day!  To escape the smell and any bad karma/chi/energy lurking in the kitchen below me, we tried out the kitchen on the other side of the building.  What a discovery!  It was more than 50% bigger than the kitchen below me!  The downside: it is rather far, and it is no fun to carry pots, baking sheets, ingredients, etc. all that way...and even worse if you forget something.  Always good to know we have an excellent backup though!

    These blondies were made for our lovely blondie Emma (her 20th birthday)...and for the lab meeting.  The original recipe called for Heath Bar Crumbles, which normally (or so we thought) are not so hard to find.  Unfortunately, the Heath Bar does not seem to be Mr. Popular in the candy aisle and even less so in the baking/crumble aisle.  After going to at least five different stores in search of these crumbles, Brenna finally found a bag of mini Heath Bars (now, why would they have these and not the normal bars or crumbles?).  Her method to smash them into bits: a glass jar filled with loose leaf tea.

    Brown Butter Toffee Blondies
    (adapted from Eat, Live, Run)

    Ingredients:

    • 1 cup (2 sticks) salted butter
    • 2 cups packed light brown sugar
    • 2 eggs
    • scant 1/4 tsp kosher salt
    • 2 tsp vanilla
    • 2 cups all purpose flour
    • 1 heaping cup smashed Heath Bar 
    • 1 cup chopped walnuts
    Directions:

    1. Preheat the oven to 350 degrees Fahrenheit and lightly butter two muffin tins (24 muffins total).
    2. Brown the butter by cooking it over medium-low heat until brown.  Swirl very often and don't let it burn!  This will take a couple of minutes.
    3. Put your brown sugar in a large bowl.  Pour the browned butter on top and then beat with a handheld mixer or stand mixer for about 4 minutes.
    4. Add the eggs and beat again for a minute or two.
    5. Add the salt, vanilla, and flour and beat until just combined.
    6. Fold in the Heath Bar bits and walnuts.
    7. Divide the dough among the muffin tins.
    8. Bake for 15-20 minutes until a toothpick or knife comes out clean.
    Ready for action.

    Butter: yellow.
    Butter: brown.

    Call the dentist.  Now.


    Beating beating....

    After the eggs have been beaten in.

    Flour has been added...looks more like cookie dough now!

    All the yummy crunchy bits...

    ...folded in.

    Pre-bake.

    Post-bake.

    Pre-eat.  Birthday "display" for Emma. 
    Pre-eat...still...how?  (well...we had already sampled one to make sure they weren't poisonous)
    No post-eat picture.  Obviously, since there would be nothing to photograph except my tummy.

    Another baking adventure coming up...another birthday, another lab meeting!