Friday, January 27, 2012

Bum dee dum dum

I was so good about posting on my blog every day or two for the first several weeks of my winter break.  Alas, as soon as my return to school loomed only a week away, I neglected to post anything.  I did continue to cook many interesting things, especially soups!  I was, however, very lazy about my photodocumentation.  Tisk tisk me.  So, you'll just have to believe me when I say I was being productive in the kitchen.  I was just being a bumm on the blogging front.

Now I am back at school, and although there aren't many opportunities to cook while I'm here (or at least nothing too fancy given my lack of equipment and fully-stocked pantry), I would like to keep my blog going throughout spring semester.  It would be awkward to just let it drop for a few months.  Therefore, I have decided to write this "catch-up" post, and I hope to post some new stuff soon!

Here's what I did make and take pictures of in the last week of vacation...

Apple-Pie Muffin Tops
(adapted from Oh She Glows)

Ingredients:

  • 3 medium apples (mine were nearing the end of their glory days, but they were perfect in this recipe), 1 grated, 2 chopped
  • 1/4 cup pure maple syrup
  • lemon juice of half a lemon
  • pinch of kosher salt


  • 1 1/4 cups spelt flour (or another flour)
  • 1 cup rolled oats
  • 1/4 cup lightly packed dark brown sugar
  • 1/2 cup of chopped nuts (I used whatever I had on hand...walnuts, pecans, almonds)
  • 1/2 tsp kosher salt
  • 1/2 tsp baking powder
  • 2 tsp cinnamon
  • 1/8 tsp freshly ground nutmeg


  • 1 tbsp flaxmeal mixed thoroughly with 3 tbsp water and allowed to sit for 15 minutes
  • 1 tsp vanilla extract
  • 1/4 cup whole milk
  • 1/3 cup mashed ripe banana


Directions:

  1. Mix together flaxmeal and water.  Whisk well and let sit for at least 15 minutes, whisking every once and a while, until very gloupy.
  2. Preheat the over to 350 degrees Fahrenheit and line a baking sheet with parchment paper.
  3. Peel your apples.  Grate 1 apple.  Chop the other two apples.  Add all the apples to a medium pot and add the maple syrup, lemon juice, and salt.  Cook over medium-low heat for about 10 minutes while you put together the rest of the ingredients.  Stir a few times so it doesn't burn.
  4. Combine the dry ingredients in a large bowl.  Combine the wet ingredients in a small bowl.
  5. Once cooked, add apple mixture to the wet ingredients and stir well.  Then, pour everything into the dry ingredients and mix well until it all comes together.
  6. Scoop 2 tbsp onto baking sheet for each muffin top.  Do not press down.
  7. Bake for about 14 minutes until golden.  These will remain soft; they will not get crispy.
  8. Cool on baking sheet for 5 minutes and then transfer to wire rack to cool completely.
  9. Eat as a breakfast muffin, afternoon snack, or reheated with some ice cream (I recommend lemon) for dessert!


Ready for the oven.
Oh hello, Mr. Squirrel...peeking into my kitchen to see the yummy muffin tops, I see...not for you, my friend. 
Nicely golden, just out of the oven. 
Mmm gobble gobble.
Veggie Burgers
(adapted from Oh She Glows...guess I was in an Oh She Glows mood the last week of break!)

Ingredients:

  • 1/2 cup onion, diced
  • 1 large garlic clove, minced
  • 2 1/2 tbsp flaxmeal whisked with 1/2 cup water and allowed to sit for 15 minutes
  • 1 cup oats, processed into flour
  • 1.5 cups fresh bread crumbs (I used spelt bread and some other dry bread I had in the breadbox)
  • 1 cup grated carrots
  • 1 cup black beans from a can, drained
  • at least 1/2 cup fresh parsley, chopped
  • 1/2 cup sunflower seeds
  • 1/3 cup mixture of sunflower seeds and pumpkin seeds
  • 1 tbsp olive oil
  • 1 tbsp tamari
  • heaping 1 1/2 tsp oregano
  • heaping 1/2 tsp paprika
  • 1/4 tsp cayenne
  • 1 tsp cumin
  • salt and pepper to taste
Directions:
  1. Preheat oven to 350 degrees Fahrenheit.
  2. Process your oats into a flour in the food processor.  If you are making your own bread crumbs, process these too.  Whisk together the flaxmeal and water.  Let sit for at least 15 minutes, whisking occasionally, until very gloupy.
  3. In a large pan on medium heat, cook the onion in some olive oil for 10 minutes, stirring occasionally, until soft and a little brown.  Add the garlic and cook for another minute or two, stirring constantly.  Let cool for a few minutes.
  4. Put all ingredients in a large bowl, including your cooked onion mixture and gloupy flax mixture.
  5. Mix all the ingredients together.  Then, form into patties.  Pack them tightly so they don't crumble.
  6. Bake for 25-30 minutes, flipping halfway through, until crispy and golden on both sides.
  7. Eat them plain, with ketchup, or in a bun as a burger!  I had some pickled radishes on the side...a perfect complement!
Such colorful ingredients! 
Patty-making time...

All my patty cuties ready to go into the oven.

Golden, crisp, and oh so delicious.
Finally, perhaps my biggest achievement in my last week of vacation: conquering my fear of poaching eggs.  I had never done it before.  Shamefully, I had previously been too scared to try because I kept hearing it was difficult to do right.  But it's not too bad!  Just bring a pot of water to barely a simmer, add a few teaspoons of white vinegar, crack your egg into a small bowl, create a whirlpool in the middle of the pot of water, and drop the egg into the whirlpool.  Cook for 3-4 minutes, remove, and enjoy!

On a piece of multigrain sourdough...

...and some salt and pepper added.  Look at that divine yolk run!
And there you have it.

Mimi was too busy helping pack up the Christmas ornaments to help me (keep me company) in the kitchen...

I'm surprised she didn't break them....

Glamour shot.  'Nuf said.

Friday, January 13, 2012

There's nothing like a stew in wintertime...

I love stew.  Love love love it.  Here's why:

- Stew has the most wonderful consistency.
- Stew really brings together all your ingredients so that the flavors can marry instead of being in separate little piles on your plate.
- I find stew bowls to be rather attractive, in regards to their proportions.
- You can play around with stew recipes as much as you want - there's no exact science to stews!  Don't have this ingredient?  Then use that one.  Don't like this?  Substitute that.  You sacrifice nothing!
- Who doesn't like saying "stewwwww"?

We have all these gorgeous root vegetables from our CSA share.  The great thing about root vegetables is that they hold up really well in stews because they are so hearty themselves.  I knew I wanted to make a stew with some of our veggies, and I was in a chicken mood.  I searched through a few recipes for inspiration.  I found a recipe for "Chicken Stew with Onion, Tomatoes, and Dijon".  I loved the idea of using Dijon in the stew, and the spices they used in the recipe were all things I had in my pantry.  Sadly, the stew didn't call for any veggies other than the tomatoes, and I need my veggies.  Therefore, I just made a few adjustments to accommodate lots of carrots and rutabaga.

This was one of the most fabulous winter stews I have had in a while.  Filling but at the same time light with all the vegetables!

Chicken Stew with Carrots, Rutabaga, and Dijon (adapted from Simply Recipes)

Ingredients:

  • olive oil
  • 2 chicken legs, bone-in and skin-on, about 1 pound (or use breast if you prefer, but I think the legs have a lot more flavor and do really nice things in a stew!)
  • salt and pepper
  • 1 red onion, chopped in large pieces
  • 3 garlic cloves, chopped
  • 5 medium carrots, cut into 3/4" pieces
  • 1 large rutabaga (potatoes or other root vegetables would work too), cut into 3/4" pieces
  • one 28 ounce can of whole peeled tomatoes
  • 1 1/2 tsp dried thyme
  • 2 bay leaves
  • 1/4 tsp oregano
  • 1/4 tsp cumin
  • pinch of cayenne
  • 1/2 cup white wine
  • 3 tbsp Dijon mustard


Directions:

  1. Heat a little bit of olive oil in a large, heavy-bottomed pot or Dutch oven on medium-high heat.
  2. Pat the chicken legs dry with a paper towel.  Then, salt and pepper the chicken legs on both sides.
  3. When the oil is hot, add the chicken to the pot, skin side down first.  Cook for a few minutes until nicely browned and then flip over and cook for another few minutes.  When your chicken is browned all over (it won't be fully cooked on the inside yet), remove the chicken from the pot and place on a plate.  Set aside.
  4. Toss the onions into the pot that had the chicken in it before.  Cook the onions for several minutes until soft and a little brown.  Turn frequently so they don't burn.
  5. Then, add in the garlic.  Cook for two minutes, stirring almost constantly.
  6. Add in the carrots and rutabaga.  Cook for 5 minutes, stirring a few times.
  7. Add in the tomatoes, thyme, bay leaves, oregano, cumin, and cayenne.  Stir well.
  8. Put the browned chicken legs on top of the veggies in the pot and nestle them in a bit so that they are well surrounded by the rest of the ingredients but not totally submerged.
  9. Pour in the wine.  
  10. Bring to a simmer.  Then, cover and cook on low heat (enough to keep it simmering) for 40 minutes, stiffing occasionally.
  11. After 40 minutes, remove the chicken to a clean plate; the chicken should now be fully cooked.  Add the mustard to the pot and stir well.  Increase the heat to medium-high and cook uncovered for 10-20 minutes until the sauce is thick and the vegetables are tender.  
  12. Remove the bay leaves.  Add back in the chicken and let the stew cook for another few minutes to re-warm the chicken.
  13. Serve stew over some sort of grain.  I used whole farro, but brown rice, couscous, or pasta would be divine as well!
This was delicious for dinner and still scrumptious reheated the next day for lunch!

Yesterday's Breakfast

After making my cinnamon raisin swirl bread, I knew I had to try it out as French toast.  Very glad I did!  It was delicious - fluffy and light with a delightful little chew from the raisins.  In my milk-egg mixture for the French toast, I added some more Satsuma orange zest and cinnamon to really drive home those flavors in the bread.

Just a sprinkling of powdered sugar on top is all the sweetness this French toast needs!

Wednesday, January 11, 2012

Twirly Swirly Delight

There is perhaps nothing more soothing than a piece of cinnamon raisin swirl bread.  I don't know what it is about it - it just makes you feel cozy.  Flipping through Dorie Greenspan's "Baking From my home to yours", I saw this recipe for cinnamon raisin swirl bread, and I just couldn't resist making a batch (now wishing I had made two batches!).  Eaten as a mid-afternoon snack or breakfast item (either with butter or as French toast), this bread is absolutely delicious.  Every time I take a bite, I twirl in delight!


Cinnamon Raisin Swirl Bread
(adapted from Dorie Greenspan's "Baking From my home to yours")

Ingredients:

For the bread

  • 2 1/4 tsp (1 packet) active dry yeast
  • 1/4 cup plus one pinch sugar
  • 1 1/4 cup warm whole milk
  • 1/2 stick (4 tbsp) butter, at room temperature
  • 1/4 tsp salt
  • 1 large egg
  • 1/2 tsp vanilla extract
  • zest of one satsuma orange (or clementine or half orange)
  • pinch of freshly grated nutmeg
  • 3 3/4 to 4 cups all-purpose flour

    For the swirl
    • 1 tbsp sugar
    • 2 tsp cinnamon
    • 2 tsp unsweetened cocoa powder
    • 1 cup moist raisins (I used a mixture of dark and golden)
    • 3 tbsp butter, softened to spreadable consistency

      Directions:
      1. Put yeast in small bowl with a pinch of sugar and stir in 1/4 cup of the warm milk.  Let rest for several minutes until bubbly.
      2. In a stand mixer, first fitted with the paddle attachment, combine the remaining 1 cup milk, butter, and remaining 1/4 cup sugar.  Mix on low speed for two minutes.
      3. Add the salt, egg, vanilla, zest, and nutmeg.  Mix for a minute.  (Your mixture may look curdly and yucky, but this is fine!)
      4. Add the yeast mixture and beat on medium-low speed for 1 more minute.
      5. Add 2 3/4 cups of the flour.  Mix on low speed until just incorporated.  The dough will be sticky.
      6. Switch to the dough hook.  Add the remaining 1 cup flour.  Increase the speed to medium and beat the dough for 3 minutes.  The dough should come together and almost clean the sides of the bowl.  You may need to add up to 1/4 cup more flour (1 tbsp at a time).
      7. Keep beating the dough for another 3 minutes on medium speed until it is smooth and has a "buttery sheen".  The dough will be very soft.
      8. Butter a large bowl and turn the dough into the bowl.  Cover tightly with plastic wrap and let rest in a warm (78-82 degrees Fahrenheit) place until doubled in size, about 1 1/2 hours.
      9. Once doubled, scrape the dough onto a large piece of plastic wrap and wrap tightly.  Place in the freezer for 30 minutes until firm enough to be rolled out.
      10. Once firm, butter a 9x5-inch loaf pan.  Whisk together the sugar, cinnamon, and cocoa.
      11. Lightly flour your work surface.  Put the dough on the surface and flour the top.  Roll the dough into a 12x18-inch rectangle.
      12. Gently smear 2 tablespoons of butter on the dough with your fingers.
      13. Sprinkle the sugar mixture over the rectangle and scatter the raisins.
      14. Starting from the short side of the dough, roll the dough up snugly.
      15. Fit the dough into the buttered pan, seam side down, tucking the ends under the loaf.  Cover the pan loosely with wax paper and let it sit in a warm place for about 45 minutes until the dough rises a little above the edge of the pan.
      16. Once almost fully risen, preheat the oven to 375 degrees Fahrenheit.  
      17. Melt the remaining tablespoon of butter and brush the top of the loaf with it.  Put the loaf pan on a baking sheet and bake the bread for 20 minutes.
      18. Then, cover the loaf loosely with a foil tent and bake for another 25 minutes until the bread is golden brown and sounds hollow when you tap the bottom of the pan.
      19. Transfer the pan to a wire rack to cool for 5 minutes.  Then unmold the bread.  Continue to cool the bread to room temperature on the wire rack.
      20. Devour.  (With more butter on top!).


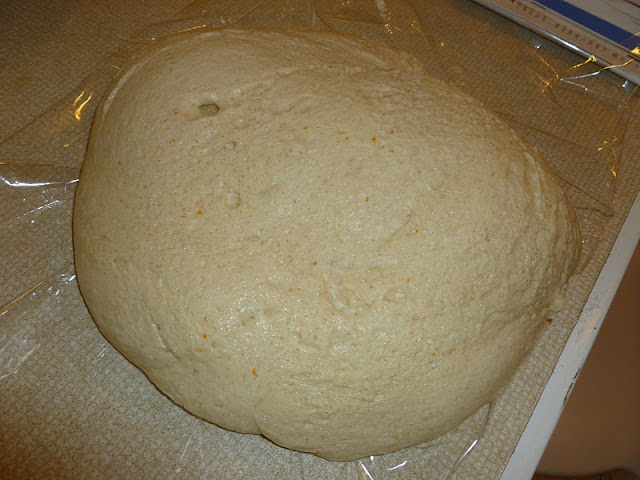
      Dough pre-rise.

      Dough post-rise.  Doubled indeed!

      The dough needs to spend some time in the freezer to firm up - rolling the dough out at this point would be a nightmare because it's so soft!

      Looks kind of like an ant farm?

      Rollllll.

      Just one more rise...

      ...risen just above the edge of the pan.

      Shiny shiny butter yummm.

      Beautifully golden brown!

      Look at that fantastic swirl!

      Close up for proper swirl analysis.  The combo of dark and golden raisins adds some pizazz, I'd say!

      ...and if you haven't seen enough yet...or if you aren't drooling yet (p.s. you should be...I certainly was taking these pictures).

      Tuesday, January 10, 2012

      Repurposing Speculoos Spread

      Whenever we go to Belgium, I always bring back multiple packages of Speculoos cookies.  They are so crisp and buttery - the perfect complement to a cup of coffee!  I have never seen Speculoos sold in the U.S., but I have recently seen Biscoff cookies in certain grocery stores.  Speculoos and Biscoff cookies are very very similar, and I honestly don't know if there is much of a difference.  I'd be curious to know...a topic for future research.

      Anyways, a year or two ago, I started hearing about this new craze: Speculoos Spread (or Paste, some call it).  I was intrigued.  Did this spread really just taste like Speculoos but creamy-fied?  I needed to try it!  I asked my dad to bring some for me from Belgium on his next trip to the U.S.  I tried it first on a piece of toast.  Woah it was just like the cookie!  ...except after another bite, it was just too sweet to go on bread.  Alas, I didn't know what to do with my giant jar of Speculoos Spread.  Finally, I stumbled upon a recipe for Biscoff Oatmeal Cookies on Two Peas and Their Pod, and I thought: perfect!  The taste of Speculoos was meant to be in a cookie format, not spread on bread.  I would repurpose the spread into a crunchy cookie!

      Now, it struck me as a little odd what I was doing...performing a reversion of sorts.  I think the spread is basically made from Speculoos cookies ground up with a little more oil to give it a creamy consistency.  And now, I was making back into a cookie?  Did this make sense?  This didn't phase me for too long, and I promptly whipped up a batch of these crunchy, caramelized cookies.  They are delicious with coffee or with ice cream (I ate them with homemade lemon ice cream).

      Speculoos Oatmeal Cookies (adapted from Two Peas and Their Pod)

      Ingredients:

      • 1 1/2 cups rolled oats
      • 1/2 cup plus 2 tbsp all-purpose flour
      • 1/2 tsp baking soda
      • 1 tsp cinnamon
      • pinch of salt
      • 1 stick (1/2 cup) butter, at room temperature
      • 1/2 cup Speculoos Spread (or Biscoff Spread will work)
      • 1/2 cup granulated sugar
      • 1/2 cup dark brown sugar
      • 1 large egg
      • 1/2 tsp vanilla extract

      Directions:

      1. Preheat oven to 350 degrees Fahrenheit and line a baking sheet with parchment paper.
      2. In a medium bowl, whisk together oats, flour, baking soda, cinnamon, and salt.  Set aside.
      3. In your stand mixer, fitted with the paddle attachment, beat the butter, Speculoos Spread, and sugars on medium speed until smooth and creamy.
      4. Add egg and vanilla extract and beat until smooth.
      5. Reduce the speed to low and add in the dry ingredients.  Mix only until everything is incorporated
      6. Refrigerate the dough for 30 minutes.
      7. Use an ice cream scoop (or two spoons) to spoon the dough onto your baking sheet.  Leave ample space (2 inches) between the cookies.  Do not press the cookies down.
      8. Bake for 8-10 minutes until the cookies are golden and slightly firm around the edges.  Let cookies cool on baking sheet for 5 minutes and then transfer to a wire rack to cool completely.

      Sweet and buttery wet ingredients.

      And the dry ingredients all ready to go.

      Egg and vanilla into the creamed wet ingredients.

      The marriage of the wet and the dry.

      Dough ready to rest in the fridge for 30 minutes.

      Cookie dough lumps.

      Then they get flat and crispy!

      This recipe makes plenty of cookies (don't worry - they freeze beautifully!).

      Serve these special cookies in a whimsical mug for added flair.

      Now for the perfect complement to your cookie:


      Lemon Ice Cream (adapted from David Lebovitz)

      Ingredients:

      • zest of 2 organic lemons
      • 1/2 cup (100 gr) sugar
      • 1/2 cup lemon juice (2-3 lemons)
      • 2 cups half-and-half
      • pinch of salt


      Directions:

      1. Put the lemon zest into your food processor or blender.  Add the sugar and process until zest is very fine.
      2. Add the lemon juice and process until the sugar is completely dissolved.
      3. Add in the half-and-half and process until smooth.
      4. Chill for 1 hour in the refrigerator.
      5. Then, freeze the mixture in your ice cream maker according to the manufacturer's instructions.
      6. Transfer to a container and freeze further in the freezer.


      Lots of gorgeous lemon zest.   Zesty!

      Little bit o' sugar to sweeten it up.

      Juicy juicy.

      Lemon juice into the mix.

      Creamy dreamy half and half.

      Let the freezing begin!

      Almost done...

      Frozen to perfection.  So lemony and refreshing.

      Sunday, January 8, 2012

      I gave agave a try - and so glad I did!

      My all-time favorite ice cream guru: David Lebovitz.  I have been reading his blog for a few months now, and I have rented his book "The Perfect Scoop" many many times (...and suffered many many library fines).  Finally, I received his book for Christmas this year!  The first ice cream I made over winter break was Mr. Lebovitz's Eggnog Ice Cream.  It is to die for.  Alas, all good things must come to an end.  When only a few scoops were left, I knew I needed to make another delicious ice cream to fill the void in my dessert-eating that would come as soon as I ate the last bite of eggnog ice cream.  I had seen Mr. Lebovitz's recipe for Agave-Sweetened Chocolate Ice Cream on his blog several months ago, and I finally decided to try it.  Luckily, we had plenty of agave on hand, and like any good Belgians, we had a complete selection of very dark chocolates.

      This ice cream is delicious and so smooth.  It reminds me a lot of chocolate pudding - but frozen!  (...and I guess that that is what it is in theory...)

      Agave-Sweetened Chocolate Ice Cream (adapted from David Lebovitz)

      Ingredients:

      • 1/2 cup plus 1 tablespoon agave
      • 2 ounces (55 gr) 70% cocoa chocolate, chopped very finely*
      • 1/3 cup unsweetened cocoa powder
      • 1 1/2 cups heavy cream**
      • 1 1/2 cups whole milk**
      • 5 large egg yolks, at room temperature
      • pinch of salt
      *You can also use completely unsweetened chocolate (what the original recipe calls for).  If you do this, just add in an extra tablespoon of agave.

      **You can also use 3 cups of half and half instead (what the original recipe calls for).

      Directions:
      1. Warm the agave and chocolate in a small saucepan over very low heat until the chocolate is completely melted.  You want to stir constantly lest the chocolate burn!  
      2. Once melted, remove the mixture from the heat and pour into a large bowl.  Set aside.
      3. Mix together the heavy cream and whole milk.
      4. Put half (1 1/2 cups) of the cream/milk mixture into a medium saucepan and whisk in the cocoa powder.  Cook over moderate heat until the mixture begins to bubble.  Let the mixture simmer for 30 seconds, whisking frequently to ensure there are no cocoa clumps.
      5. Remove the mixture from the heat and add it to the bowl with the chocolate/agave mixture.  Stir well and then set a fine mesh strainer over the bowl.  Set aside.
      6. In a medium bowl, lightly whisk together the egg yolks.
      7. Put the remaining cream/milk mixture into a medium saucepan with a pinch of salt and heat over moderate heat until warm.  Turn off the heat when warm.
      8. Very slowly pour the warm cream/milk into the egg yolks, whisking constantly.  When all the cream/milk has been added to the yolks, pour the mixture back into the saucepan.
      9. Turn the heat on moderate-low and cook the cream/milk/yolk mixture until it becomes steamy and thickens.  (To judge "thickness": When you dip a wooden spoon in the custard, a thick coat should cover the back of the spoon.  When you run your finger through this coat, you should get a clear, well-defined line with no custard flowing back to where you ran your finger.)  Stir constantly with a spatula during this process!   
      10. Pour the mixture through the strainer into the chocolate mixture.
      11. Stir it all together and then let cool until tepid.
      12. Once cooled, pour the mixture into your blender and blend for 10 seconds until very smooth.  (Never blend super hot liquids in a blender!)
      13. Chill the mixture in your refrigerator for at least 8 hours or overnight.
      14. Freeze the mixture in your ice cream maker according to the manufacturer's instructions.
      15. Package the frozen mixture and transfer to your freezer to finish the freezing process.

      Swirltastic...

      ...too bad I had to stir it all together...but it is a rather luscious chocolatey color.

      This froze beautifully in my ice cream maker.

      Ready to go into the freezer to firm up a bit more.

      A cone was the perfect vessel for this ice cream!